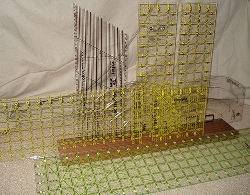
 Acrylic rulers are awesome for getting straight cuts from your fabirc. The most obvious way to use one is laid across the fabric and lined up with the grid on a cutting mat. But what if the ruler is too short? Or you want to make a cut midway across the fabric? It turns out that there are many ways to handle that if you know how to use your acrylic rulers effectively. Craft Apple has some tips on their blog for doing just that. Go to the article.
[photo from Craft Apple]
[tags]sewing, tutorial, cutting, rotary, cutter, acrylic, ruler, fabric, grid[/tags]

I have a 6X24 and a5x24 with a lip on it to hook on my 30x 36 cutting mat. then I have a 17×23 cutting mat and a 6×9 cutting mat. 2 regular rulers with raised numbers for clay work I don’t know how many other regular rulers. A 12.5 x 12.5 square, a 6.5 x 6.5 square
a 5.5x 5.5 square to make triangles a 4.5×4.5 square and a 6″x6″ square a quilters equilateral triangle, a 6″ triangle. a easy hexagon ruler. a dresdan plate ruler. 2 french curves,a speed draft hexagon and circle ruler. A 5.5″ circle ruler to make circles in quilting. A protrator and a ruler to make hearts and a yard stick and several measuring tapes for sewing and two measuring tapes you use in building. Oh yes a metal 12″ ruler. Thats all I think.( Does a knitting gauge count)( I hope I win I certainly don’t want anyone to think I have a addiction to measuring implimets.