There’s something about sewing for Easter that feels calmer than the rest of the year. Maybe it’s the softer colours, maybe it’s knowing this isn’t a project that needs to last forever or survive teenage growth spurts. A fabric Easter basket is exactly that kind of project. Simple, practical, and satisfying in a way that makes you wonder why you ever bought the plastic ones.
This beginner-friendly fabric Easter basket sewing pattern is one of those reliable makes you’ll come back to year after year. It’s quick enough to sew in an afternoon, forgiving if your seams aren’t perfect, and sturdy enough to hold a proper Easter egg haul. If you’re new to sewing or just want an easy win, this one won’t let you down.
This tutorial is written so you can sew straight through without hopping between tabs or second-guessing yourself.
Why Sew a Fabric Easter Basket?
Reusable fabric Easter baskets are having a bit of a moment, and for good reason. They’re quieter, softer, and don’t end up cracked and sad in the bottom of the cupboard by next year. They also double as storage baskets long after Easter is over.
If you’re sewing for kids, these baskets are lightweight and easy to carry. If you’re sewing for gifts or décor, they look thoughtful without being fussy. And if you’re sewing for yourself (my favourite reason), they store flat and take up almost no space.
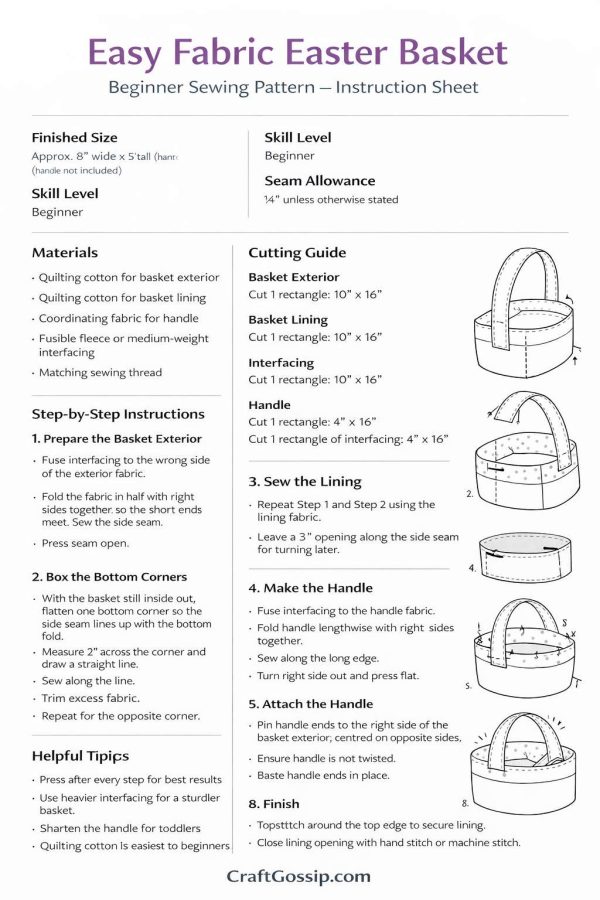
Finished Size
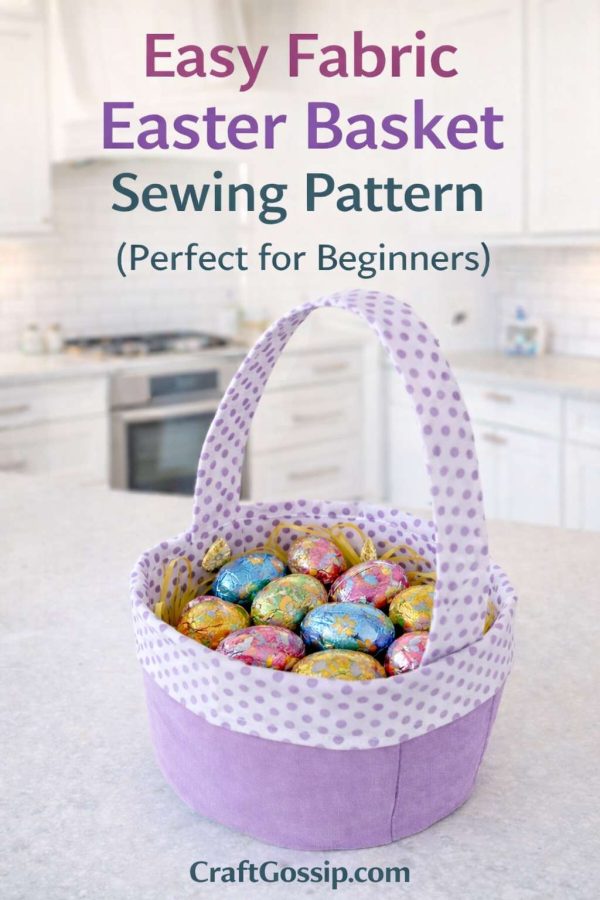
Approx. 8 inches wide x 5 inches tall
(Handle not included in height)
This size works perfectly for Easter egg hunts, wrapped treats, small toys, or even as a spring table basket.
What You’ll Need
- Outer fabric: quilting cotton
- Lining fabric: quilting cotton
- Handle fabric: coordinating scrap
- Fusible fleece or medium-weight interfacing
- Matching thread
- Sewing machine
- Scissors or rotary cutter
- Pins or clips
- Iron
Optional but helpful: walking foot if your machine doesn’t love layers
Fabric Tips for Beginners
Quilting cotton is your best friend here. It’s stable, presses beautifully, and behaves itself under the needle. Linen blends or cotton canvas also work, but if you’re new to sewing, stick with quilting cotton and let the interfacing do the heavy lifting.
Small florals, polka dots, gingham, and subtle prints age much better than novelty Easter fabrics. If you want to use this basket every year, think spring rather than “Easter aisle explosion.”
Cutting Instructions
Basket Exterior
Cut 1 rectangle: 10” x 16”
Basket Lining
Cut 1 rectangle: 10” x 16”
Interfacing
Cut 1 rectangle: 10” x 16”
Handle
Cut 1 rectangle: 4” x 16”
Cut 1 rectangle of interfacing: 4” x 16”
If you want a taller basket, you can add an extra inch to the height. I wouldn’t recommend going wider unless you plan to reinforce it more heavily.
Step 1: Prepare the Outer Basket
Fuse the interfacing to the wrong side of the outer fabric following the manufacturer’s instructions. Take your time with this step. A well-pressed piece makes everything that follows easier.
Fold the fabric in half with right sides together so the short edges meet. Sew down the side using a ¼” seam allowance. Press the seam open.
Step 2: Create the Basket Base
This step gives the basket its shape.
With the basket still inside out, pinch one bottom corner flat so the side seam lines up with the bottom fold. Measure 2 inches across the point and draw a straight line.
Sew along that line. Repeat on the other corner.
Trim off the excess fabric, leaving about ¼”.
Turn the basket right side out and you’ll see the base pop into place.
Step 3: Sew the Lining
Repeat the same process with the lining fabric.
Fold in half, sew the side seam, then box the corners exactly the same way.
Important: leave a 3-inch gap along the side seam. This is how you’ll turn the basket right side out later.
Step 4: Make the Handle
Fuse interfacing to the wrong side of the handle fabric.
Fold the handle in half lengthwise with right sides together. Sew along the long edge using a ¼” seam allowance.
Turn right side out and press flat.
Topstitch along both long edges. This step isn’t optional if the basket will be carried around by kids. It makes the handle much stronger and helps it keep its shape.
Step 5: Attach the Handle
Pin the handle ends to the right side of the exterior basket, centring them on opposite sides.
Before stitching, double-check the handle isn’t twisted. This is the kind of mistake we all make at least once, usually while thinking about dinner.
Baste the handle ends in place with a narrow seam.
Step 6: Assemble the Basket
Place the exterior basket inside the lining, right sides together. Match the side seams and pin all the way around the top edge.
Sew around the top using a ¼” seam allowance.
Turn the basket right side out through the opening in the lining. Push the lining down inside the basket and press the top edge neatly.
Step 7: Finish the Basket
Topstitch around the top edge to keep the lining from rolling out and to give the basket a professional finish.
Close the lining opening with a small hand stitch or a neat machine stitch.
Your fabric Easter basket is finished.
Easy Customisation Ideas
Once you’ve made one, it’s hard not to start thinking about variations.
- Add a name using iron-on vinyl or embroidery
- Use contrast fabric for the handle
- Make matching baskets for siblings
- Add lace or trim for a vintage look
- Use seasonal fabrics to make Christmas or Halloween baskets
This pattern adapts beautifully once you’re comfortable with the basics.
Troubleshooting for Beginners
- If the basket collapses, use heavier interfacing or add a second layer
- Press every seam as you go for cleaner results
- Shorten the handle for toddlers so it doesn’t drag
- If your machine struggles, slow down and lengthen your stitch slightly
A Sewing Project You’ll Actually Use
This beginner fabric Easter basket sewing pattern is the kind of project that reminds you why you like sewing in the first place. It’s practical, forgiving, and leaves you with something useful rather than another thing to store “just in case.”
Whether you’re sewing one basket or a whole stack, this is an easy Easter sewing project you’ll be proud to pull out year after year.