 We do Thanksgiving at my mom’s house every year. It doesn’t matter whether there are 5 of us or 15 of us, she makes the same amount of food. A LOT. Even on her long dining table, it’s a challenge to find places for all of the dishes. Not a bad problem to have, I know!
Years ago, a friend gave her a quilted table runner and she uses that as a giant hot pad down the center of the table. The only problem is it’s a Christmas table runner! Black fabric with red poinsettias is very festive on December 25, but kind of out place for Thanksgiving.
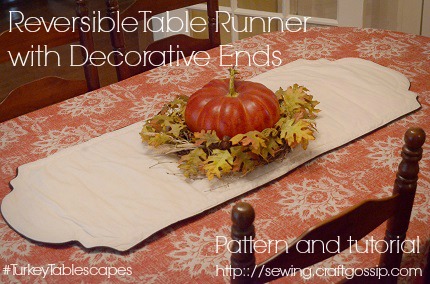
When I saw that the theme for Jo-Ann’s Celebrate The Season Thanksgiving campaign was Turkey Tablescapes, I knew what needed to be done. My mother needed a new table runner. She likes clean lines and classic styles, so I’d keep it fairly plain but I’d make the ends decorative. And I’d make it reversible so she’d have two designs to choose from. Her old table runner was just quilted with batting, but I decided to add a layer of Insul Bright to better protect her antique table from the hot dishes.
I’ve got a tutorial down below showing how I made it, as well as a coupon you can print out to get 50% off of one item or fabric cut at Jo-Ann.
I took my mother with me to Jo-Ann to pick out the fabric for her table runner. We ended up with a gorgeous mustard floral and an off-white nearly solid with a very faint basket weave design. Both are quilting cottons so they were easy to work with.
My mother couldn’t wait for Thanksgiving to use her new table runner, so she went ahead and made a full turkey dinner for us last week to try it out.
Looking for more sewing patterns for table runners? Check these out on Etsy.
And it worked! It’s a generous size, 18″ x 48″ finished, so there was plenty of room for all the many dishes she set out on the table. And notice that stuffing. Cornbread, y’all, cause that’s how it’s done down south.
How to make a reversible insulated table runner with decorative ends
The sewing on this table runner is actually fairly simple. You’ll have some loooooong seams, but really it’s not any more complex than making a pillow with piped edges. I used quilting cottons for the top and bottom layers, but you could also use home dec weight fabrics.
You’ll need:
—Fabric for the top layer, 48 3/4” x 18 3/4”
—Fabric for the bottom layer, 48 3/4” x 18 3/4”
—Fusible fleece, 48 3/4” x 18 3/4”
—Insul Bright, 48 3/4” x 18 3/4”
—Piping, roughly 6 yards. That’s two packages of the premade stuff if you’re buying it already made. Or, you can make your own. The Sewing Loft has a good tutorial showing how.
How to sew it:
1. Use the decorative end pattern to the shape both ends of each piece of fabric, the Insul Bright, and the fusible fleece. DON’T CUT AROUND ALL FOUR EDGES. Line the pattern so the fancy edge is near the end of the fabric and just cut that edge.
2. Trim 3/8” seam allowance from the fusible fleece and the Insul Bright.
3. Fuse the fleece to the wrong side of the top layer of fabric.
4. Layer the Insul Bright on top of the fleece. Baste it down to keep it from shifting. I basted 5 short seams, evenly spaced down the table runner. (You’ll remove these stitches later.)
5. Sew the piping around the edges of the bottom layer of fabric, right sides together. Use a zipper foot so you can stitch close to the piping. Clip the piping seam allowance at the corners to get it to lie/lay flat. (If you’ve never done piping before, Melly Sews has a good tutorial over at Keeping It Simple showing how.)
6. Place fabric pieces right sides together and sew around all the edges, leaving 4 inches or so to turn it right side out.
7. Clip corners and curves and turn the whole thing right side out.
8. Iron well to smooth the curves and corners. Turn under the seam allowance on the turning hole and iron it in.
9. Top stitch close to the piped edge all the way around. This will close the hole. Use the zipper foot to get as close to the piping as possible.
10. Top stitch again, 1 inch in from the previous line of stitching. If you have a walking foot, use it to help keep fabric from puckering.
11. Remove your basting stitches.
12. Bring it to your mama’s house for a test drive with a full turkey dinner.
For more Thanksgiving crafting inspiration, check out Jo-Ann’s Celebrate The Season site. Or see their catalog for crafting and gift ideas, plus some coupons.
And when you find a piece of fabric or a craft supply you can’t live without, print this coupon to get it for 50% off.
Looking for more things to sew for Thanksgiving? Check out these sewing patterns we found on Etsy.


Love the way it looks and so easy Anne!