• Home
  • Suggest A DIY
  • DIY Newsletter

Sewing

Patterns, Techniques, Articles, Blogs, and other resources to learn how to sew

  • About CraftGossip
  • Our Network
    • Bath & Body Crafts
    • Candle Making Ideas
    • Crochet Ideas
    • Cross Stitch
    • Edible Crafts
    • Felting Patterns
    • Glass Art
    • Home & Garden Ideas
    • Indie Crafts
    • Jewelry Making
    • Kids Crafts
    • Knitting Patterns
    • Lesson Plans
    • Needlework
    • Party Ideas
    • Polymer Clay
    • Quilting Ideas
    • Recycled Crafts
    • Scrapbooking
    • Sewing Patterns
    • Card Making
    • DIY Weddings
    • Not Craft Ideas
  • Giveaways
  • Roundups
  • Store
  • Search

How much fabric do you need to make a dress?

June 28, 2009 by Anne Weaver

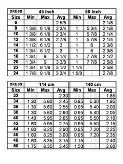
dress-chart

dress_table

Gwen from After the Dress shares the latest in her “How Much Fabric?” series, with her table showing how much fabric it takes to make an average dress.  Given the wide variety in dress styles, she includes examples of dresses that would require a minimum, average, or maximum amount of fabric.  Get the table.

[graphic from After the Dress]

The amount of fabric needed to make a dress varies depending on several factors, including the size of the garment, the width of the fabric, and the design of the dress. As a general rule of thumb, most dresses require approximately 2-3 yards of fabric for sizes up to 14, and 3-4 yards for larger sizes.

However, it’s always best to consult the specific pattern you’re using for the exact fabric requirements. The pattern should include a fabric requirement chart that lists the amount of fabric needed based on the size of the garment and the width of the fabric.

It’s also worth mentioning that some fabrics have a directional print or a nap, which means the fabric needs to be cut in a specific direction. In these cases, you may need more fabric to accommodate the pattern’s placement.

In conclusion, the amount of fabric needed to make a dress varies, and it’s essential to consult the specific pattern and fabric requirements to ensure you have enough fabric to complete your project.

If you, like me, struggle with math, you’ll need to understand what it takes to make garments. This guide will help you estimate the fabric yardage for several of the garments you create.
How to Calculate Yardage The first step is to determine the overall width and length of the project.
One meter is equivalent to 1.09 yards or 39.4 inches.
When making garments out of printed/patterned fabric, additional yardage is required to match the prints perfectly. If you’re constructing a short dress with short sleeves for a youngster, 1 yard of fabric should be enough. A minimum of 2 to 3 yards of broadcloth is required for a longer adult-size garment with long sleeves.
 

«
»

Comments

  1. j. harkness says

    January 8, 2011 at 2:05 pm

    hi please help wondering how many metres of fabric is needed for skating dress. daughter is 5ft slim build.

  2. michaela says

    February 23, 2012 at 10:40 am

    Iam 8 and I relly want to be a fashon disener but I cant be won I made a bundel of dresses shose hats jrlew tresersw and tops so plise I am despret to be won send me a mesage now

  3. kathryn says

    September 16, 2012 at 8:35 am

    I was wondering how much fabric i would need to make a puffy knee high dress sorta old timy still in style but wondering how much i need for halloween

Have you read?

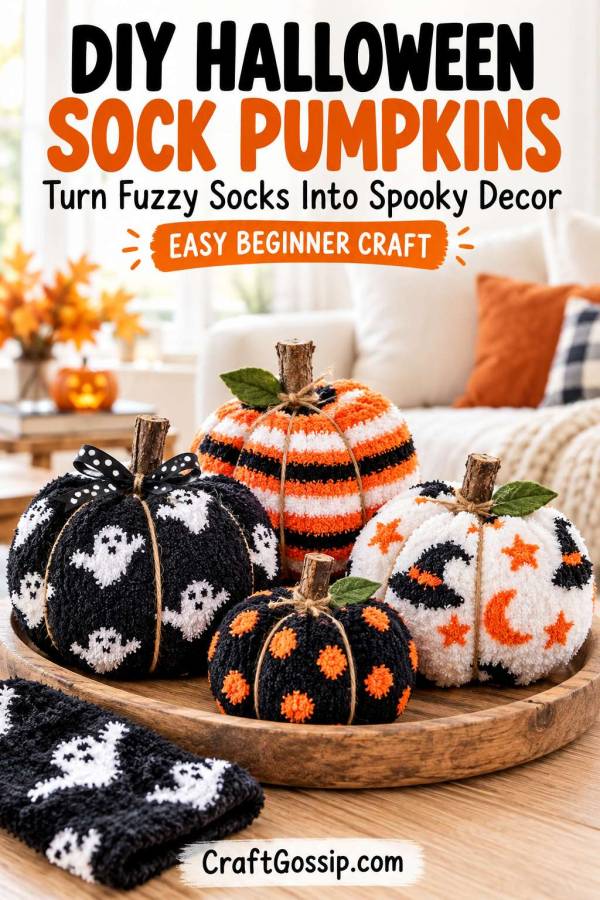
DIY Halloween Sock Pumpkins: Easy Fuzzy Pumpkins With Ghosts, Stripes and Witch Hats

Some craft supplies announce themselves immediately. Others look suspiciously like something you were supposed to put in the laundry basket.

These fuzzy Halloween socks fall into the second category. With little white ghosts, orange dots, witch hats and cheerful stripes, they are practically asking to become a collection of soft decorative pumpkins.

This DIY Halloween sock pumpkin tutorial uses the leg section of each sock, a little stuffing and yarn wrapped around the outside to create the pumpkin grooves. Add a natural twig stem, and you have a small Halloween decoration for a shelf, tray or mantel.

There is a little hand sewing to close the bottom, but no sewing machine or paper pattern required. The sock already provides the fabric tube, which takes care of a good chunk of the work.

The finished pumpkins will look handmade, and that is part of their charm. Different sizes, slightly uneven sections and a cheeky ghost peeking around one side make a much more interesting display than five identical pumpkins lined up for inspection.

Choosing Your Halloween Socks

The socks pictured give you several coordinating options:

  • Black with white ghosts: Lovely for a darker pumpkin with playful little characters.
  • Orange, black and white stripes: A bright centrepiece for the group.
  • Black with orange dots: A simple pattern that works well around the curved shape.
  • White with black “Boo” lettering and a spider: Best positioned carefully before shaping.
  • White with witch hats, orange stars and a crescent moon: A lighter pumpkin that breaks up the black and orange palette.

Use the leg section above the heel to avoid the non-slip grips on the soles. Those grips are excellent for walking across slippery floors, but they are less useful decorating the side of a pumpkin.

If you are using socks you already own, wash and dry them first and check for holes or weakened fabric.

We have shared pumpkins made from old socks before, and patterned Halloween socks give the idea a fun seasonal twist.

What You Need

  • Fuzzy Halloween socks like the designs shown
  • Polyester toy stuffing or clean stuffing reclaimed from an old cushion
  • Strong sewing thread
  • Sewing needle
  • Smooth, strong yarn or soft cotton twine
  • Scissors
  • A ruler
  • Short, clean, dry twigs for stems
  • Hot glue gun and glue sticks
  • Optional felt leaves, narrow ribbon or jute twine

Skill level: Beginner friendly
Making time: Approximately 30 to 45 minutes per pumpkin
Finished size: Depends on the sock dimensions and stuffing
Display: Indoors

Choose black shaping yarn for the black socks and cream or white yarn for the lighter designs if you want the wrapping to blend in.

If you need supplies, fuzzy Halloween socks, toy stuffing and smooth cotton yarn are useful items to look for at a craft shop or Amazon. Check the sock photographs carefully: the pattern needs to appear on the leg section you will be using.

How to Make Halloween Pumpkins From Fuzzy Socks

1. Choose the Pattern You Want to Show

Lay out the sock and identify the motifs above the heel.

For the ghost and witch-hat designs, choose a prominent motif to become the front of the pumpkin. With the “Boo” sock, check that the wording sits within the section you are keeping.

Remember that stuffing and shaping will stretch the design. Lettering may curve or bunch slightly, so treat it as a playful detail rather than expecting it to remain perfectly flat.

2. Cut Off the Sock Leg

Cut straight across just above the heel, keeping the leg and cuff as an open-ended tube.

Check that the piece has no sole grips on it. Set the foot section aside.

You can remove a contrasting cuff if you prefer, but only if enough fabric remains to make a small pouch.

3. Sew the Bottom Closed

Turn the tube inside out.

Sew a running stitch around the cut edge, approximately 1 cm in from the edge. Make sure the stitches catch the knitted fabric beneath the fuzzy surface.

Pull the thread gently to gather the opening. Secure with several stitches and a firm knot, then stitch across any remaining gap.

Turn the tube right side out. This gathered closure becomes the bottom of the pumpkin.

4. Add the Stuffing

Fill the pouch through its remaining opening, adding small pieces of stuffing and distributing them evenly.

Shape it into a plump, rounded ball that still compresses easily when squeezed.

Avoid stuffing it until it feels hard. You need enough give to pull the yarn into the sides and create the pumpkin sections.

Push the bottom closure inward slightly to help form a flatter base.

5. Tie the Top Closed

Gather the opening above the stuffing and tie it securely with strong yarn or thread.

Add a second knot and check that the filling cannot escape.

Trim the excess fabric, leaving approximately 2 to 3 cm above the tie. Fold this small tuft down towards the centre.

Do not trim close to the knot, as the closure could slip loose.

6. Wrap the Pumpkin Sections

Cut enough shaping yarn to wrap around the stuffed ball four times, with extra length for tying.

Leave a tail at the top. Take the yarn down one side, across the centre of the bottom and up the opposite side, returning to the top.

Repeat at a right angle to the first wrap. Add two more wraps halfway between the existing lines.

Four complete wraps create approximately eight pumpkin sections.

Pull each wrap firmly enough to indent the stuffing, keeping the yarn crossing at the same points on the top and bottom.

Tie securely at the top and tuck the trimmed ends beneath the fabric tuft.

For patterned socks: Position the first wraps around your chosen front motif where possible. You can also use three complete wraps for six broader sections if a ghost or witch hat needs a little more room.

7. Adjust the Pumpkin Shape

Gently squeeze the stuffing into rounded lobes between the yarn lines.

Check that the pumpkin sits steadily and that your chosen motif faces forwards.

If the lettering or a character has disappeared into a groove, loosen and reposition that wrap before tightening it again.

The fuzzy surface may partly conceal the yarn, giving the pumpkin a softer finish.

8. Attach a Twig Stem

Choose a short twig, approximately 4 to 7 cm long, with a reasonably flat bottom.

Apply hot glue around the folded fabric tuft and nestle the twig into the folds. Hold it in place until the glue sets.

Avoid piercing through the sock or opening the gathered closure.

A short, lightweight stem will be easier to secure and less likely to make the pumpkin tip over.

9. Add a Small Finishing Detail

Keep the decoration simple so the sock patterns remain the main feature.

Try a muted green felt leaf on the striped pumpkin, a narrow orange ribbon on the ghost design or a little black bow beside the witch-hat stem.

You can wrap jute around the base of the twig to conceal the attachment, but avoid covering too much of the patterned fabric.

How to Style Your Halloween Sock Pumpkins

Arrange three or five pumpkins together, varying their sizes slightly. Place the striped orange version beside a black ghost pumpkin and a white witch-hat pumpkin for an easy coordinated display.

A shallow tray keeps the group together on a coffee table. On a mantel, mix them with a small stack of books and an LED candle.

Keep the fabric pumpkins away from flames and other heat sources.

If you want to make larger pumpkins alongside these little sock versions, our fabric pumpkin patterns in three sizes offer another way to build a varied display. For a different soft texture, take a look at the Minky pumpkin sewing tutorial.

Common Mistakes to Avoid

Including the non-slip sole: Cut above the heel and check the retained fabric before sewing.

Overstuffing: Keep the ball soft enough to shape without straining the sock.

Stitching through fluff alone: Catch the underlying knitted fabric so the closure holds.

Wrapping directly over the main motif: Plan the front before tightening the yarn.

Using rough shaping twine: Smooth yarn is easier to position without catching the fuzzy fibres.

Adding too many embellishments: The ghosts, dots and witch hats already provide plenty of detail.

Keeping Them for Next Halloween

Store the pumpkins somewhere dry, with room around the stems. Avoid placing heavy decorations on top.

Before displaying them again, check the stem attachments and gently reshape any flattened sections.

These are decorative pumpkins rather than toys, particularly once the twigs and glued embellishments are attached.

What I like about this little Halloween craft is that the fabric does much of the decorating for you. A few simple stitches, some stuffing and a handful of yarn wraps turn those fuzzy socks into something cheerful for the house. And if one ghost ends up peeking sideways around a pumpkin groove, I would call that personality.

Categories

Bags and purses Children's Christmas Easter fleece Free Sewing Patterns Girl's Dress Halloween Hats Home Decor No-sew Pillows Refashions Scrap Fabric sewing Sewing Patterns Sewing Techniques Softies T-shirts Women's

RSS feed: More Articles More Articles

  • Free Animal Person Embroidery Design Review
  • DIY Halloween Sock Pumpkins: Easy Fuzzy Pumpkins With Ghosts, Stripes and Witch Hats
  • Free Felting Tutorial Friday: Felt Into Autumn with Heidi Feathers
  • Knit a Classic Aran Cardigan with this Free Knitting Pattern
  • Printable Letter Books for Preschoolers
  • How to Make an Interactive Halloween Mini Scrapbook Album
  • 10 Ice Cubes That Instantly Elevate Champagne
  • Setting Up a Beginner Craft Space? A Practical Shopping List
  • Thrift Store Upcycling: Rustic Pumpkin Decorations From Glass Bowls
  • Mini Pumpkins and Jack o’Lanterns to Cross Stitch

Pick Your Blog

  • Sewing
  • Knitting
  • Quilting
  • Crochet
  • Home & Garden
  • Recycled Crafts
  • Scrapbooking
  • Card Making
  • Polymer Clay
  • Cross-Stitch
  • Edible Crafts
  • Felting
  • Glass Art
  • Indie Crafts
  • Kids Crafts
  • Jewelry Making
  • Lesson Plans
  • Needlework
  • Bath & Body
  • Party Ideas
  • Candle Making
  • DIY Weddings
  • Not Craft
  • Free Craft Projects

Copyright © 2026 · CraftGossip | Start Here | Contact Us | Link to Us | Your Editors | Privacy and affiliate policy