 Anna from Plan B shows how to add a lace insert to the back of a blazer. Go to her blog for the tute.
[photo from Plan B]
Patterns, Techniques, Articles, Blogs, and other resources to learn how to sew
Anna from Plan B shows how to add a lace insert to the back of a blazer. Go to her blog for the tute.
[photo from Plan B]
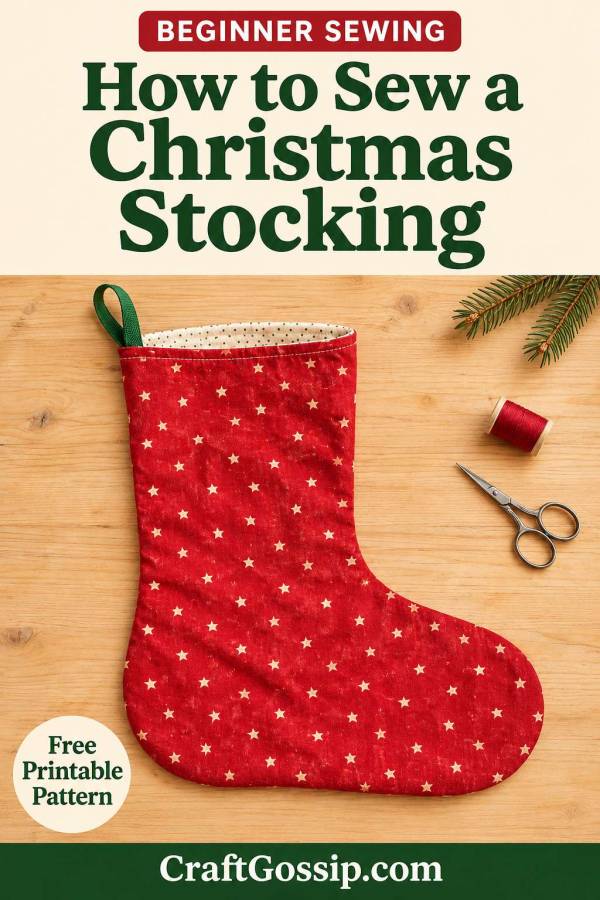
There’s something lovely about bringing out the same handmade Christmas stockings every December. The fabric becomes familiar, the children somehow keep getting taller, and that stocking you stitched at the kitchen table becomes part of the family Christmas.
If you’ve been wondering how to sew a Christmas stocking, this is a manageable place to start. You’ll make a simple fabric stocking with a full lining and a ribbon hanging loop. The lining hides the raw edges inside, so there’s no need for an overlocker or fancy seam finishes.
You’ll practise straight stitching, gentle curves and a little topstitching. Nothing terribly complicated, and certainly nothing that requires buying half the sewing shop. Although I understand how easily that happens.
For your first stocking, choose an easy cotton fabric and keep the decorations simple. A cheerful Christmas print does most of the work for you.
Free Download PDF with printable Pattern – beginner-christmas-stocking-sewing-pattern
This tutorial uses a paper template that you trace or draw yourself. There is no separate printable pattern required.
Quilting cotton is a good choice for beginners. It presses neatly, holds its shape while cutting and feeds through a sewing machine without too much fuss.
Use quilting cotton for both the outside and lining. A contrasting lining looks especially pretty when someone peeks inside.
For your first attempt, leave stretchy jersey, slippery satin and thick faux fur in the cupboard. They can look wonderful, but they make cutting and sewing a little more demanding.
You can also use a clean cotton pillowcase or leftover fabric from another project. Check that it is sound and doesn’t have thin, worn patches.
Fabric tip: Small prints are forgiving. Large checks, stripes and pictures that need matching require more planning.
For one stocking made from a template up to approximately 45 cm tall and 30 cm wide, before adding seam allowance, gather:
Check that your paper pattern fits your fabric before cutting, especially if the print has a definite upright direction. Larger stockings will need more fabric.
Sewing clips are handy for holding the layers together, but ordinary pins work perfectly well. There’s no need to buy special tools for one Christmas project.
Right side: The front of the fabric, usually the side with the clearest print.
Wrong side: The back of the fabric.
Right sides together: Place the printed faces against each other, so the wrong sides face out.
Seam allowance: The distance between the cut fabric edge and your stitching.
Backstitch: Sew a few stitches backwards, then forwards, to secure the beginning or end of a seam.
Topstitch: A visible line of stitching sewn from the outside of the project, usually close to an edge.
Wash and dry your fabrics according to their care instructions, then iron them flat.
This helps deal with shrinkage before sewing, which is useful if the stocking might need washing later. It also makes accurate cutting much easier.
A wrinkle under your paper pattern can turn into a surprisingly wonky edge. Ask any sewing basket full of abandoned projects.
The easiest option is to trace around an existing Christmas stocking.
Lay it flat on paper and trace its outline, including the straight top edge. Then draw a second line 1 cm outside the entire outline for your seam allowance. Cut out along this outer line.
If you don’t have a stocking to trace, draw a simple boot shape:
These measurements describe the intended finished outline. Add a 1 cm seam allowance around it before cutting out your template.
A generous ankle makes the stocking easier to turn and easier to fill. Christmas oranges and little gift boxes appreciate a bit of room.
Important: If you use a sewing pattern that already includes seam allowance, don’t add it again.
Fold your outer fabric with right sides together. Place the template on top and cut through both layers.
You should have two outer pieces that are mirror images when placed right side up.
Repeat with the lining fabric.
You now need:
For directional prints, check that the pictures run upright from the foot towards the opening on both outer pieces.
Keep the straight leg of the template parallel to the fabric’s selvedge, the tightly woven finished edge.
If you want a stitched initial, fabric heart or simple name label, attach it to one outer piece now.
Keep decorations clear of the seam allowance and leave space below the top edge for finishing.
For another decorating idea, our appliqué Christmas stocking tutorial shows a different approach using fabric motifs and a decorative cuff.
For your first stocking, a plain printed fabric is absolutely enough. You can always make the next one more elaborate.
Place the two outer pieces right sides together. Pin or clip around the sides and foot.
Using a 1 cm seam allowance, sew from one top corner, down around the heel, along the sole, around the toe and back up to the other top corner.
Leave the straight top edge open.
Backstitch at the beginning and end.
Use a straight stitch approximately 2.5 mm long as a starting point. Test it on a scrap of your fabric first.
Slow down around the curves. If you need to adjust the fabric, stop with the needle down, raise the presser foot, turn the fabric slightly, lower the foot and continue.
Guide the fabric gently rather than pulling it through.
Place the lining pieces right sides together.
Sew around the sides and foot with the same 1 cm seam allowance, but leave an 8 to 10 cm gap along a straight section of the back leg seam.
Keep this gap away from the heel curve.
Backstitch at both ends of the gap, as well as at the beginning and end of the main seam.
Leave the top opening unsewn.
That side gap is how you’ll turn everything right side out later. Marking it with two pairs of pins can help prevent an enthusiastic sewing session from closing it accidentally.
Careful clipping helps the rounded edges sit smoothly once turned.
On both the outer stocking and lining:
Do not cut through the seam.
Leave the seam allowance around the lining’s turning gap intact so you can fold it neatly inside later.
Turn the outer stocking right side out. Gently ease out the toe and heel with a blunt tool, then press.
Leave the lining inside out.
Fold the ribbon in half, bringing its two cut ends together.
On the right side of the outer stocking, position the ribbon ends at the top of the back seam, above the heel.
Align the ribbon’s raw ends with the stocking’s raw top edge. The folded loop should point down towards the heel, lying against the outside of the stocking.
Baste across the ribbon ends approximately 5 mm from the top edge. Basting is temporary stitching that holds the loop in place before the final seam.
Keep the rest of the loop clear of the top edge.
Slide the right-side-out outer stocking inside the inside-out lining.
The right sides of the fabrics should face each other. Match the toes, heels, side seams and raw top edges.
The hanging loop will be sandwiched between the layers.
Pin or clip around the opening.
Sew all the way around the top opening, using a 1 cm seam allowance. Take care to sew through only the two layers directly under the needle, rather than catching the opposite side of the opening.
Sew backwards and forwards once more over the ribbon ends for reinforcement.
Find the gap in the lining seam.
Gently pull the stocking through this gap until both the outer fabric and lining are right side out. Work slowly rather than tugging hard at the opening.
Ease the toe and heel into shape.
Fold the seam allowances at the lining gap inward by 1 cm. Close the gap with small hand stitches, or machine stitch close to the folded edges.
Push the lining into the outer stocking, matching the heels and toes.
Roll the top seam between your fingers until it sits neatly on the edge. Press, keeping the lining just inside the stocking.
Topstitch around the opening approximately 3 mm from the edge. This helps stop the lining creeping out.
Keep the hanging loop lifted clear of your stitching.
Give the stocking a final press, and it’s ready for those little Christmas surprises.
Cut each pair from fabric folded right sides together. This gives you the mirrored shapes needed for the front and back.
The straight top edge stays open when sewing each stocking shape. You join the outer fabric and lining around that opening later.
Mark the turning gap before sewing. It’s much easier than reaching for the seam ripper afterwards.
Sew slowly, avoid pulling the fabric and clip the seam allowances before turning. If a pucker is stitched into the seam, unpick that small section and resew it before moving on.
Only the ribbon’s raw ends should be caught in the top joining seam. Keep its folded section out of the way.
Once you’ve made a basic version, try:
If you fancy another reusable Christmas sewing project, these fabric Advent calendars to sew offer plenty of inspiration for carrying a favourite fabric theme through your decorations.
And keep those usable offcuts. Our key fob sewing ideas using fabric scraps are a lovely way to turn leftovers into small stocking fillers.
No, but a lining hides the raw seams and gives lightweight cotton a more substantial feel. This method creates a tidy interior without an overlocker.
Yes. Use small backstitches for the construction seams and secure the hanging loop firmly. Allow more time, particularly around the curved sections.
It depends on your template and the dimensions of the fat quarters. Lay out your paper pattern first. A full-size stocking will often need one fat quarter for each individual outer or lining piece, so check before cutting.
Yes, but a separate cuff needs additional fabric and different top-edge assembly. Finish this plain lined version first to learn the construction, then try a cuffed design.
That depends on the fabric, ribbon, stitching and hanging support. Use it for lightweight treats and small gifts. Place heavy presents underneath rather than hanging them from the loop.
Your first stocking doesn’t need perfectly matched prints or elaborate embroidery. A neatly sewn cotton stocking, made in fabric you love, has plenty of Christmas charm all on its own.
And next December, when you pull it out of the decorations box, you’ll have the lovely satisfaction of saying, “I made that.”