• Home
  • Suggest A DIY
  • DIY Newsletter

Sewing

Patterns, Techniques, Articles, Blogs, and other resources to learn how to sew

  • About CraftGossip
  • Our Network
    • Bath & Body Crafts
    • Candle Making Ideas
    • Crochet Ideas
    • Cross Stitch
    • Edible Crafts
    • Felting Patterns
    • Glass Art
    • Home & Garden Ideas
    • Indie Crafts
    • Jewelry Making
    • Kids Crafts
    • Knitting Patterns
    • Lesson Plans
    • Needlework
    • Party Ideas
    • Polymer Clay
    • Quilting Ideas
    • Recycled Crafts
    • Scrapbooking
    • Sewing Patterns
    • Card Making
    • DIY Weddings
    • Not Craft Ideas
  • Giveaways
  • Roundups
  • Store
  • Search

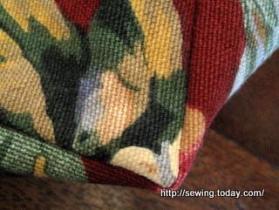
Sewing Tutorial: Clipping for sharp corner points

July 6, 2009 by Anne Weaver

clippingcorners

Sharp corner points can make or break the final look of your sewing projects, especially in areas like pockets, collars, or tote bag corners. Achieving crisp, clean corners requires precise clipping and turning techniques. This tutorial will walk you through how to clip and stitch corners to create sharp, professional-looking points.

The key to sharp corners is in how you handle the seam allowance. When approaching the corner, stitch with precision, stopping and pivoting exactly where the two seam allowances meet. Then, clip the seam allowance at a 45-degree angle close to the stitching without cutting through the seam. This removes the bulk from the corner and allows for a clean turn. Once turned right-side-out, use a point-turner or a blunt tool to gently push the corner out for that sharp finish.

Follow this method for perfect corner points, ensuring that your sewing projects have clean, professional edges every time.

.  Go to the tutorial to see how it’s done.

[photo from Christine Sews]

«
»

Comments

  1. Christine Sews says

    July 7, 2009 at 9:30 am

    Thanks for the link Anne!

Have you read?

How To Sew a Throw Pillow

Tired of your old and drab throw pillows that came with your couch, or maybe yours didn’t come with any and you would like some! Then I have the sewing project for you.

How to Sew a Throw pillow. This sewing project is easy that even if this is your first project I can guarantee you success at it. Plus this sewing project doesn’t take long.

Actually, it is so quick you may just make a throw pillow for each month of the year to keep it fresh and new. Start sewing your very own throw pillows today and impress your friends when they come over to visit and you can say I made those.

13 Floor Pillows to Sew for Your Home

Easy Pillow Blanket Quillow Sewing Tutorial

14 Quillows To Sew – Quilt / Pillow Sewing Patterns

Categories

Bags and purses Children's Christmas Easter fleece Free Sewing Patterns Girl's Dress Halloween Hats Home Decor No-sew Pillows Refashions Scrap Fabric sewing Sewing Patterns Sewing Techniques Softies T-shirts Women's

RSS More Articles

  • A Single Skein Shawl to Knit for Summer
  • Book Review: Dear Math, We’re Not Friends
  • 7 Easy Ways to Upgrade Plain Tomato Sauce From a Squeezy Bottle
  • The Hattitude Beanie free crochet pattern
  • FREE Palm Leaf Font for Summer
  • 10 Quilted Bag Ideas to Make with Scrap Fabrics
  • Stitch a Silly Goose Wizard
  • 14 Crochet Pumpkin Patterns for Cozy Fall Decorating
  • How to Turn Digital Stamps Into No-Line Images (Step-by-Step Guide for Cardmakers)
  • How to Make A Floral Fancy Fold Card

Pick Your Blog

  • Sewing
  • Knitting
  • Quilting
  • Crochet
  • Home & Garden
  • Recycled Crafts
  • Scrapbooking
  • Card Making
  • Polymer Clay
  • Cross-Stitch
  • Edible Crafts
  • Felting
  • Glass Art
  • Indie Crafts
  • Kids Crafts
  • Jewelry Making
  • Lesson Plans
  • Needlework
  • Bath & Body
  • Party Ideas
  • Candle Making
  • DIY Weddings
  • Not Craft
  • Free Craft Projects

Copyright © 2026 · CraftGossip | Start Here | Contact Us | Link to Us | Your Editors | Privacy and affiliate policy