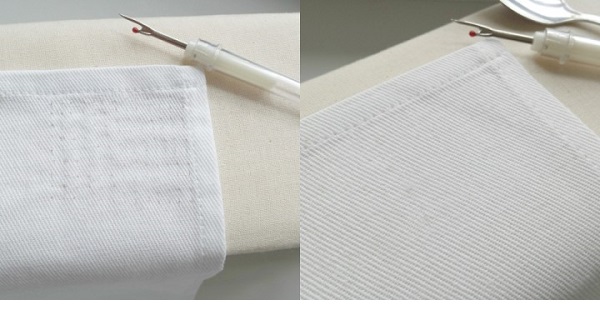
Tutorial: How to get rid of stitch marks after ripping out a seam
Ripping out stitches is just a fact of life for sewists. Sooner or later, we all find ourselves sitting with a project and a seam ripper to take out unwanted or misplaced stitches. The seam ripper will remove the stitches quite easily, but you’re often left with little holes in the fabric where the stitches were. Portia from Makery shows how you can get rid of those little holes so there’s no evidence of unpicked stitches.
Click below to see how to do it:
How to Remove Stitch Marks from Fabric, by Makery (this link is no longer valid)
[photo from Makery]
Which seam ripper works best? Seam ripper reviews
Sewing pattern: The right way to use a seam ripper
Freebie:;If You See A Seam Ripper- printable
Tutorial: Using an electric seam ripper
We’ve all been there—the frustrating moment when you realize that a seam you’ve just sewn is not quite right and needs to be ripped out. While ripping out stitches can fix the problem, it often leaves behind unsightly stitch marks on the fabric. But fear not! With a few simple techniques and a little patience, you can easily get rid of those stitch marks and restore your fabric to its pristine condition. Here’s a step-by-step tutorial to guide you through the process:
Materials you’ll need:
- Fabric with stitch marks
- Iron
- Clean white cloth
- Steam iron (optional)
- Fabric marker (optional)
Step 1: Assess the damage Take a close look at the stitch marks on your fabric. Are they light or deep? This will help you determine the best approach to remove them.
Step 2: Iron the fabric Lay the fabric flat on an ironing board or any heat-resistant surface. Set your iron to a suitable temperature for the fabric type. Gently press the iron over the stitch marks, moving it back and forth. The heat from the iron will help relax the fabric fibers and reduce the visibility of the stitch marks. Be careful not to press too hard or leave the iron in one spot for too long to avoid damaging the fabric.
Step 3: Use a clean white cloth If the stitch marks are still visible after ironing, dampen a clean white cloth with water. Gently rub the damp cloth over the stitch marks in a circular motion. The moisture will further relax the fabric fibers, allowing them to bounce back into place. Continue rubbing until the stitch marks start to fade.
Step 4: Steam iron (optional) For stubborn stitch marks, you can use a steam iron to intensify the moisture and heat. Hold the steam iron a few inches above the fabric and release bursts of steam over the stitch marks. Follow up with the damp cloth and rub gently to help the steam penetrate the fabric fibers. Be cautious not to get the fabric too wet, especially if it’s delicate or prone to water damage.
Step 5: Repeat if necessary If the stitch marks are still visible, repeat steps 2 to 4 until you achieve the desired result. It may take a few rounds of ironing, damp cloth rubbing, and steam if needed.
Step 6: Trim excess threads (optional) Once the stitch marks are significantly reduced or eliminated, you can carefully trim any loose threads that may still be visible. Use sharp scissors and be cautious not to cut into the fabric.
Step 7: Test with a fabric marker (optional) If the stitch marks are persistent, you can try using a fabric marker that matches the fabric color. Test the marker on a discreet area of the fabric to ensure it blends well. Then, carefully apply the marker over the stitch marks, following the original stitch line. This technique can effectively camouflage the remaining marks, but it’s important to use it sparingly and test it beforehand to avoid any unintended discoloration.
Step 8: Wash and press (if necessary) Once you’re satisfied with the results, you can wash the fabric according to its care instructions. This will remove any residue from the ironing and damp cloth. After washing, press the fabric again with an iron to give it a crisp, fresh look.
And there you have it! By following these steps, you can successfully remove or minimize stitch marks after ripping out a seam. Remember, practice makes perfect, so don’t be discouraged if it takes a few attempts to achieve the desired outcome. With time and patience, you’ll be able to salvage your fabric and move forward with your sewing project. Happy stitching!


Why can’t I get to the link at makery? Safari says the link doesn’t exist! HELP, please? Inquiring minds want to know how to get rid of stitch marks!
Hmmm… can’t reach this pagewww.makery.uk’s server IP address could not be found.
THIS is the message I got when I tried to access using CHROME