• Home
  • Suggest A DIY
  • DIY Newsletter

Sewing

Patterns, Techniques, Articles, Blogs, and other resources to learn how to sew

  • About CraftGossip
  • Our Network
    • Bath & Body Crafts
    • Candle Making Ideas
    • Crochet Ideas
    • Cross Stitch
    • Edible Crafts
    • Felting Patterns
    • Glass Art
    • Home & Garden Ideas
    • Indie Crafts
    • Jewelry Making
    • Kids Crafts
    • Knitting Patterns
    • Lesson Plans
    • Needlework
    • Party Ideas
    • Polymer Clay
    • Quilting Ideas
    • Recycled Crafts
    • Scrapbooking
    • Sewing Patterns
    • Card Making
    • DIY Weddings
    • Not Craft Ideas
  • Giveaways
  • Roundups
  • Store
  • Search

Tutorial: Shorten your jeans but keep the original hem

January 14, 2017 by Anne Weaver

Tutorial: Shorten your jeans but keep the original hem

Tutorial: Shorten your jeans but keep the original hem

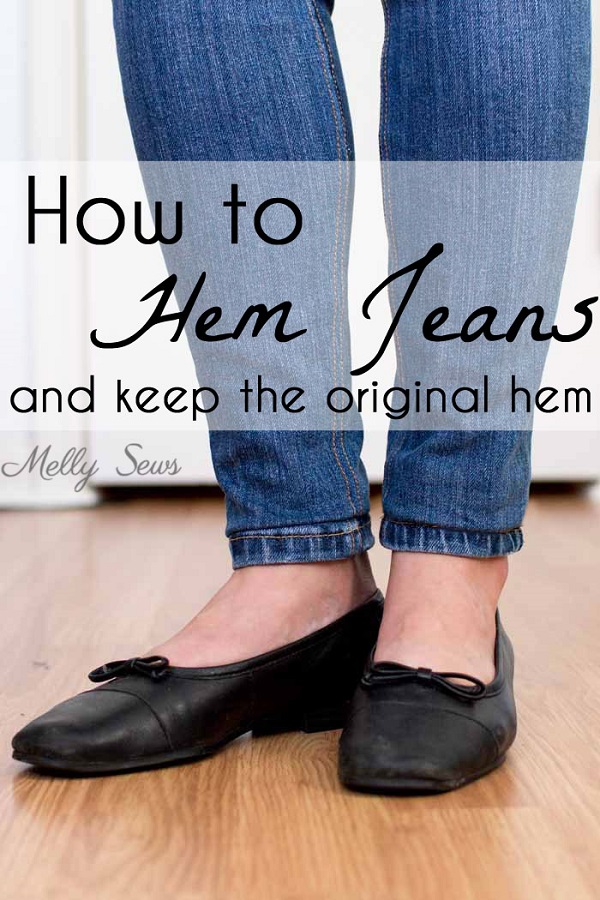
So you need to shorten your jeans, but you don’t want to lose the original hem…  Jeans just don’t look right without the slight fading and wear that appears on the hem.  Melissa from Blank Slate Patterns and Melly Sews shows how you can shorten your jeans while keeping the original hem.  It’s a simple trick that will help keep your newly hemmed jeans from looking homemade.

Click below for her tutorial:

How to Hem Jeans, by Melly Sews

[photo from Melly Sews]

«
»

Comments

  1. Sis Wait says

    January 15, 2017 at 2:23 pm

    I am a seamstress and from looking at the photo, (I tried the video and it wouldn’t load) I can tell you that they are not done properly… First you want to determine you length. Turn the jeans inside out and fold the leg with the side steams in the middle and a front and back crease at the outsides. The reason for this is because the inside seam can often be curved up higher than the outside seam. You may find this is true when you have folded them this way. The inside seam will be shorter. Now measure the length of the hem only on the outsides where the front and back creases are and not in the middle where the seams are. If these are the same measurement and you pull slightly they will be good to go. Now press at the bottom where you want your length to be. Now, I know it may seem strange to do this, but cut right in the crease you just pressed in, your finished length. Take the bottom that you just cut off and measure 1/2 inch up from the top of the original hem. (Discard the unneeded band or use for another project). Turn the leg and hem section right sides together with side seams matching. Stitch as closely as you can to the top of the original hem as possible without sewing on the original hem. Zig-Zag on the edges to prevent the fabric from unraveling. Turn right side out and press the seam you just sewed in an upward position. On the right side stitch a close top stitch all the way around the leg to keep it in place while wearing. Then I also stitch in the ditch of the side seams to also help the seam stay in place. Press and you are done. You will have a hem that no one will notice.

Have you read?

How To Sew a Throw Pillow

Tired of your old and drab throw pillows that came with your couch, or maybe yours didn’t come with any and you would like some! Then I have the sewing project for you.

How to Sew a Throw pillow. This sewing project is easy that even if this is your first project I can guarantee you success at it. Plus this sewing project doesn’t take long.

Actually, it is so quick you may just make a throw pillow for each month of the year to keep it fresh and new. Start sewing your very own throw pillows today and impress your friends when they come over to visit and you can say I made those.

13 Floor Pillows to Sew for Your Home

Easy Pillow Blanket Quillow Sewing Tutorial

14 Quillows To Sew – Quilt / Pillow Sewing Patterns

Categories

Bags and purses Children's Christmas Easter fleece Free Sewing Patterns Girl's Dress Halloween Hats Home Decor No-sew Pillows Refashions Scrap Fabric sewing Sewing Patterns Sewing Techniques Softies T-shirts Women's

RSS More Articles

  • A Single Skein Shawl to Knit for Summer
  • Book Review: Dear Math, We’re Not Friends
  • 7 Easy Ways to Upgrade Plain Tomato Sauce From a Squeezy Bottle
  • The Hattitude Beanie free crochet pattern
  • FREE Palm Leaf Font for Summer
  • 10 Quilted Bag Ideas to Make with Scrap Fabrics
  • Stitch a Silly Goose Wizard
  • 14 Crochet Pumpkin Patterns for Cozy Fall Decorating
  • How to Turn Digital Stamps Into No-Line Images (Step-by-Step Guide for Cardmakers)
  • How to Make A Floral Fancy Fold Card

Pick Your Blog

  • Sewing
  • Knitting
  • Quilting
  • Crochet
  • Home & Garden
  • Recycled Crafts
  • Scrapbooking
  • Card Making
  • Polymer Clay
  • Cross-Stitch
  • Edible Crafts
  • Felting
  • Glass Art
  • Indie Crafts
  • Kids Crafts
  • Jewelry Making
  • Lesson Plans
  • Needlework
  • Bath & Body
  • Party Ideas
  • Candle Making
  • DIY Weddings
  • Not Craft
  • Free Craft Projects

Copyright © 2026 · CraftGossip | Start Here | Contact Us | Link to Us | Your Editors | Privacy and affiliate policy