Sewing confession time. I’m invisible zipper challenged. It doesn’t matter how many times I read a tutorial, or how many tutorials I read, I always install an invisible zipper wrong. Always.
I get turned around with which side of the tape gets stitched to which side of the fabric. My invisible zipper usually ends up stitched on backwards. Once I’ve messed it up I can look at what I’ve done wrong, rip it out, and stitch it right.
But that won’t happen anymore. I’ve come up with a solution that gets it right. Every time.
I figured out that if I mark my pieces ahead of time, I won’t get turned around with which piece to put where. If you’re also challenged in the invisible zipper arena, I’ve got a tutorial for you below.
But before I give you the how-to, here are a couple of things you should know:
***In this tutorial, I use an erasable marker and school glue stick. They’re my secret sewing weapons. Both are temporary: the marker erases and the glue will wash out. They’re not appropriate for all fabric types, though. If an erasable marker won’t work on your fabric, there are other options. You could use chalk, or even small pieces of different colored tape. And if you’re using a fancy fabric that shouldn’t see the business end of a glue stick, you could always use Steam A Seam Lite or straight pins or (gasp!) hand baste.
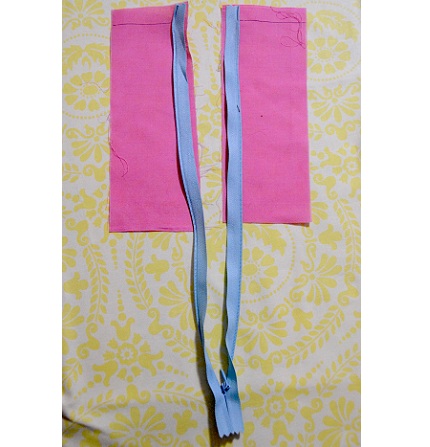
***In my photos, the zipper is longer than the fabric pieces. That’s because I had to buy a super long zipper to get the color I wanted (I thought light blue would photo better than white) and the scraps are just two random pieces of fabric I pulled out of my scrap bin. This doesn’t affect the instructions any, but in some of the photos you’ll see the zipper sticking out way below the end of the fabric pieces.
***In this tutorial I’m showing the zipper being inserted between two pieces of fabric. In reality, you’d be doing this on a garment instead. What I refer to as left and right pieces would actually be the left and right sides of where the zipper will go in the garment.
***Invisible zippers are installed at a seam, usually a center back seam or a side seam. The zipper should be installed first before you sew that seam. Then, once you’ve got the zipper in, you go back and sew the rest of the seam from the bottom of your garment up to where the zipper starts, overlapping your seams slightly.
Let’s get started!
Step 1: Iron the tape flat
Open the zipper and turn it over so wrong side faces up. With your fingers roll the zipper teeth under the tape, and iron it flat. Be sure to use a low heat setting for this. Melted zipper teeth tend to not work well. Iron both the left and the right sides of the zipper. 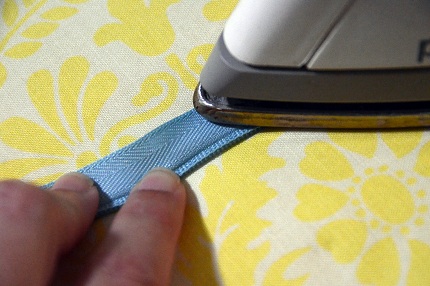
Here’s a photo of one side ironed, and one side not. Notice how there’s no zipper teeth facing up on the ironed piece and the tape is flat. 
Step 2: Mark your fabric
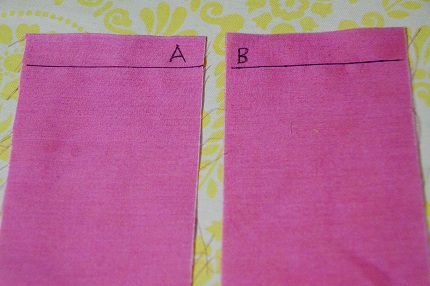
Lay your fabric out, right side up. Mark your seam allowance across the top of both pieces. In this example, I’m using a 5/8” allowance. If your top edge is already finished, you don’t need to mark a top seam allowance. (You’ll just need to align the top zipper stops with the edge.)
Mark the left piece with an A, and the right piece with a B.
Step 3: Mark your zipper tape
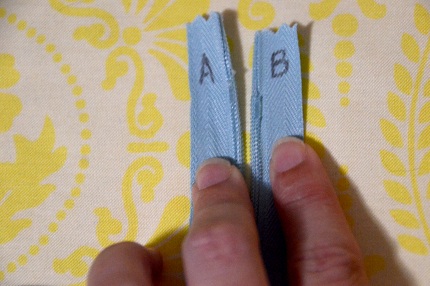
Now it’s time to mark the zipper tape. With the right side facing up (the teeth should be sticking up on this side now because you ironed them there in Step 1), mark the top of the left side of the zipper tape with an A, and the top of the right side with a B.
See where we’re going with this?
Step 4: Match your letters, glue it down!
Make your letter As kiss, lining up the plastic stopper at the top of the zipper with the top seam allowance. Get some glue stick and glue the first inch or so of the tape to the fabric. Smoochie, smoochie.
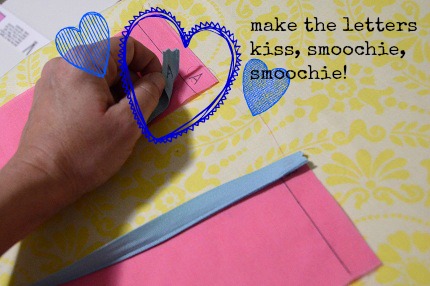
Also, keep in mind that a zipper tape is narrower than a standard 5/8” seam allowance, so the edge of the zipper tape should be a little in from the raw edge. The zipper teeth should face away from the raw edge.
Give it quick hit with the iron to dry the glue. You don’t want to gum up the inner workings of your sewing machine with glue that hasn’t dried!
Now do the same with the B markings.
Step 5: Stitch it in
FINALLY, it’s time to stitch this puppy in.
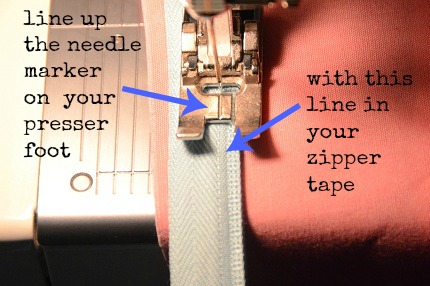
You can buy a special invisible zipper foot, but I’ve found that it’s just as easy for me to stitch it in with my standard presser foot. I’m pretty accurate with a straight seam, so if you’re not as confident you might get one of those feet.
If you use an invisible zipper foot, follow their instructions for installing the foot and stitching down the tape.
If you’re going commando, stitch on the tape just to the side of the zipper teeth. You’ll notice that there’s about 1/8” area to the side of the teeth where the weave on the tape is slightly different. That’s your target area. Keep the stitch line in there, being careful not to stitch through the teeth.
As long as you keep the tape straight, you can sew down the length of the zipper without pinning.
(And of course, just as I brag out to the internet about my ability to stitch a straight line, my example stitching is less than stellar. Ignore the wonky stitch line!)
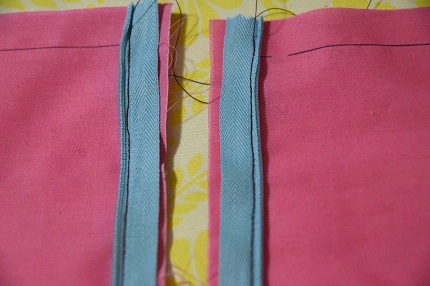
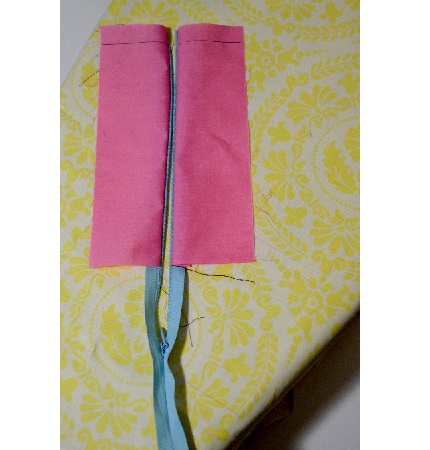
The zipper stop will keep you from stitching all the way to the bottom. That’s fine. Just stitch as far as you can. Then repeat with the other side of the tape.
When you get both sides, done you might be freaking out a little to see the bottom of the tape all twisted and funny looking. That’s okay. That’s what it’s supposed to look like.
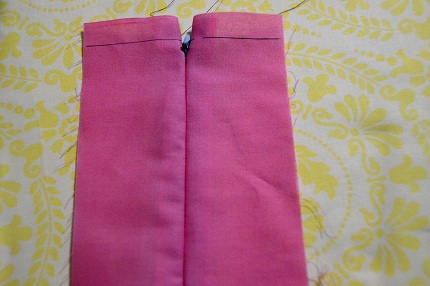
Just flip both sides of the zipper tape to the back of the fabric and you’ll see how to flip the bottom of the tape so it’s behind the fabric and lying correctly.
If you’re sewing a garment, you can now sew the rest of the seam from the bottom of the garment up until an inch or so past where the zipper tape ends.


Thank you Dear Anne! I have been sewing for 40+ years and I screw up invisible zippers all the time!
Thank you! I think this is the first invisible zipper I’ve put in the first time correctly.