
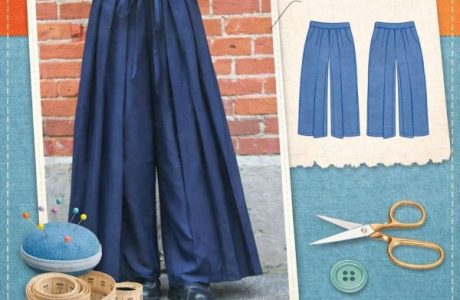
Elastic threaded through a casing is a quick, easy way to cinch in fabric. It creates pretty gathers that are also stretchy. It’s most often used on a waistline, but you can also use it to gather in the hems of sleeves or even around a neckline on a peasant blouse.
As simple as the process is, there are some pitfalls. Over the years, I think I’ve fallen prey to all of them! If the casing is too narrow, the elastic tends to roll up and twist. On other hand, if it’s too wide the elastic has too much room to move around which also causes it to roll up and twist. I’ve also been known to put a twist in the elastic when stitching it together at the end. And then there are the times I’ve used too much elastic or too little elastic and made a perfect casing that didn’t fit at all. Ugh!
So after having made every elastic mistake in the book, here’s my tried and true method for making elastic casings:
1. First things first, figure out how much fabric you’ll need to fold over to make the casing. The width of the casing should be equal to the width of the elastic plus 1/8″ ease. Add 3/8″ to that number to account for the fabric you’ll need to finish the raw edge. So the amount of fabric you’ll need to add to your finished hem length is: width of elastic + 1/8″ + 3/8″.
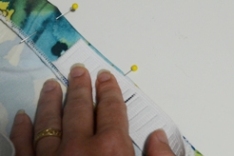
2. To make the casing, first finish off the raw edge. I usually just serge the edge with a 3/8″ allowance, but you could also fold under 1/4″ and press it with an iron. Then, fold the width of the actual casing (see below for measurement), pinning and pressing into place.
If you serged the raw edge at 3/8″, you should fold over width of elastic + 1/8″ ease.
If you’re folding under the raw edge at 1/4″, you should fold over the width of elastic + 1/8″ ease + 1/8″ allowance for stitching the casing down.
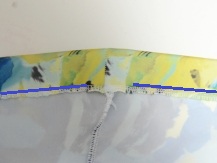
Stitch the casing down close to the edge, leaving a hole big enough to insert your elastic. If you serged the edge, your stitching should be right at the edge of the serging. If you folded under the edge, you should stitch 1/8″ from the folded edge.

3. Now, figure out how much elastic you’ll need. I usually just take a length of elastic and wrap it around myself (or whoever I’m making the garment for) where the casing will sit, pulling it so the fit is tight but still comfortable.
While it’s still wrapped around you, use a temporary pen (or ball point pen, depending on your tolerance for permanent marks on the inside of your cloths) to mark the beginning and end points. Make sure that your elastic is not twisted before you do this. If at all possible, make the marks at least a couple of inches from the ends of the elastic.
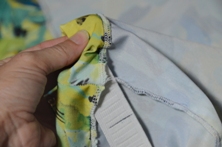
4. Now, thread the elastic through the casings. You can purchase elastic threaders at the fabric store, but I just use a safety pin pinned through the end of the elastic. When you insert the elastic into the hole, make sure that the marked side of the elastic is facing up. As you work the elastic through the casing, make sure that you don’t twist the elastic.

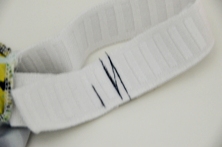
5. When you get the elastic worked all the way through the casing, you should have two ends sticking out – both with the marked ends facing up. (I put a hairclip on the end of the elastic to keep it from getting pulled into the casing.)
.
Pull the ends out far enough that you’ve got a couple of inches to work with on each side. Layer the marked ends one on top of the other without twisting the elastic.
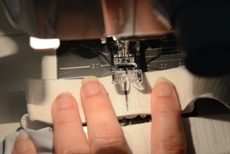
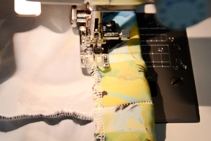
6. Take it to your sewing machine and stitch on the marked line. It’ll take some doing to get it laying down flat under the needle, so as soon as you get it lined up right put the presser foot down to hold it in place.
I usually stitch down the marked line, then reverse stitch back across the elastic, then once again about 1/8″ from the marked line.

7. Trim the ends of the elastic.
8. Stitch the hole closed, being careful not to sew through the elastic.
DONE!


Thanks for the detail instructions. I am new at this and this made the instructions very easy to understand
Fine tutorial for casings, but the one I’m working on is for 1/8″ elastic (baby clothes). No safety pin will go into the casing, even bodkins are too big. Help?
For elastic that small, I think I’d skip the casing and just zig zag the elastic directly to the fabric (stretch the elastic as you sew). If you want the elastic covered like a casing would give you, you could combine the two methods and stitch the elastic down before folding the casing. –Anne
I am also working on the neck of a toddlers top, 1/8”. I have used a baby/small safety pin, size used in stores to attach price to clothes