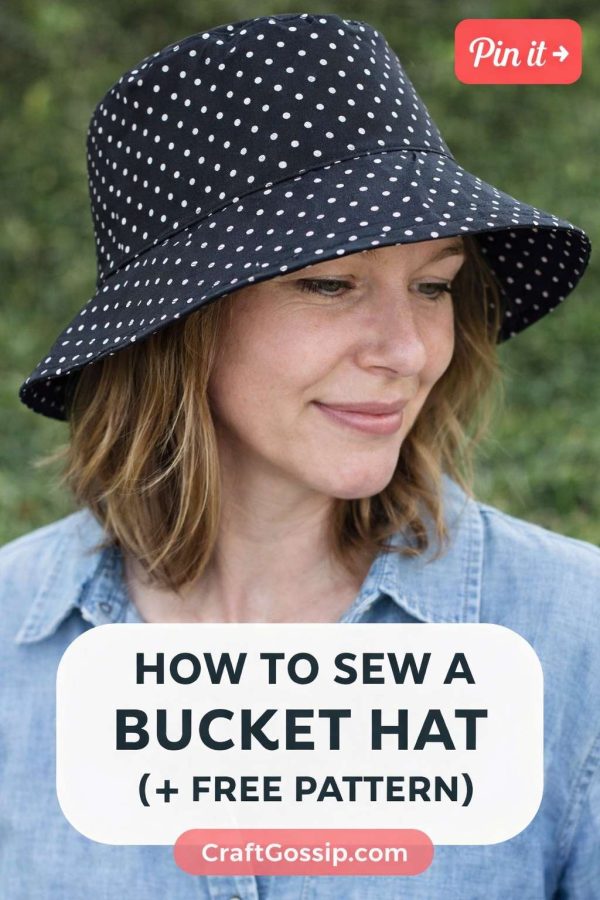
Bucket hats have quietly become one of my favourite things to sew for adults. They’re practical, wearable, and endlessly customisable — and unlike kids’ hats, adults actually keep wearing them long after the novelty wears off.
This adult bucket hat sewing pattern is designed specifically for grown-up head sizes, with a comfortable fit, a softly structured brim, and enough room to actually feel good on your head. No squeezing, no riding up, and no “this was clearly drafted for a toddler” energy.
If you’ve been looking for a reliable adult bucket hat pattern you can make again and again — this is it.
Finished Hat Details
- Adult-sized bucket hat
- Soft structured crown
- Medium-width brim
- Fully lined
- Beginner-friendly construction
- Great for everyday wear, travel, gardening, or beach days
Adult Bucket Hat Size (This Pattern)
This pattern is drafted for adult heads only.
Fits head circumference:
58–60 cm (Medium Adult)
This is the most common adult size and fits the majority of women comfortably.
For a looser fit or larger head size, you can easily add length to the side band (notes included below).
How to Measure for the Best Fit
Measure around your head:
- Just above the eyebrows
- Over the ears
- Snug but not tight
If you’re between sizes, always size up. A slightly roomy bucket hat is comfortable — a tight one never is.
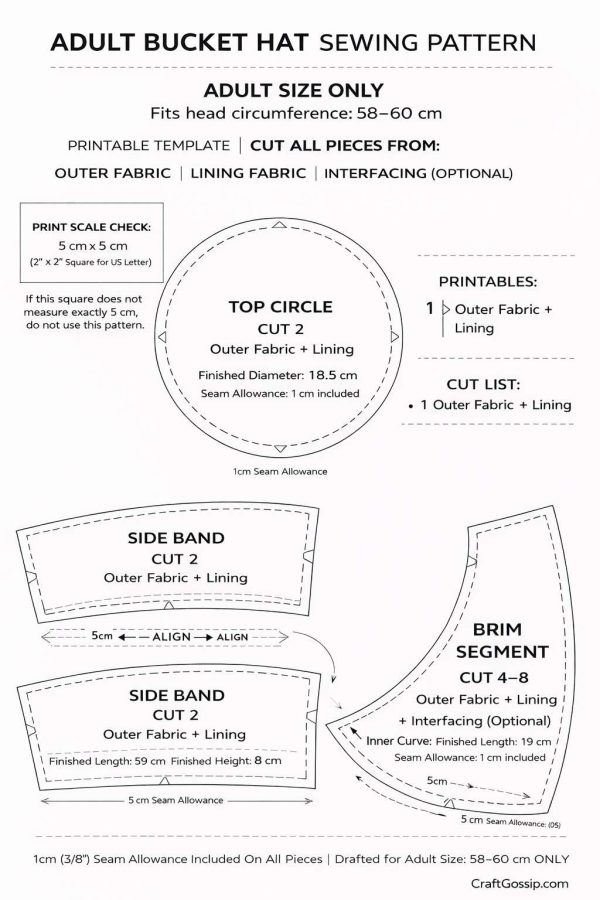
Bucket Hat Pattern Pieces (Adult Version)
This adult bucket hat uses three simple pattern pieces:
1. Top Circle (Crown)
- Cut 2
- Outer fabric + lining
2. Side Band (Crown Sides)
- Cut 2
- Outer fabric + lining
3. Brim Segments
- Cut 4–8 segments total (depending on layout)
- Cut from:
- Outer fabric
- Lining fabric
- Interfacing (optional but recommended)
All seam allowances are included.
Fabric Suggestions for Adult Hats
This pattern works best with fabrics that have a little body:
- Cotton twill
- Denim (great for upcycling old jeans)
- Canvas
- Linen blends
- Heavy quilting cotton (with interfacing)
For a softer, packable hat, skip the interfacing.
For a more structured brim, use medium-weight fusible interfacing.
Cutting Your Fabric
Cut the following:
- 1 top circle – outer fabric
- 1 top circle – lining
- 1 side band – outer fabric
- 1 side band – lining
- Brim segments:
- 2–4 outer
- 2–4 lining
- 2–4 interfacing
Fuse interfacing to the wrong side of the outer brim pieces before sewing.
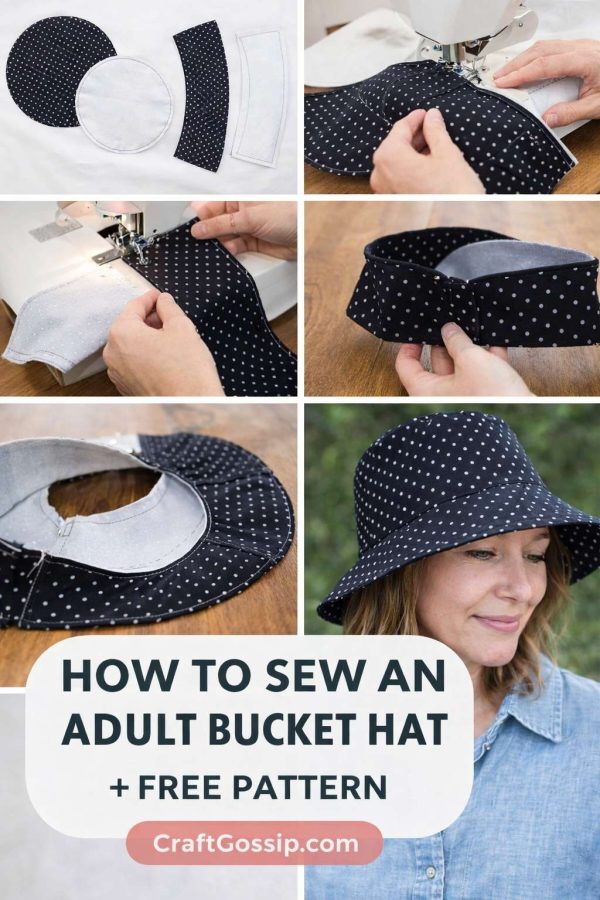
How to Sew the Adult Bucket Hat
Step 1: Sew the Side Band
Fold the side band right sides together and stitch the short ends to form a loop.
Press the seam open.
Repeat for both outer fabric and lining.
Step 2: Attach the Top Circle
Pin the top circle to the side band, right sides together.
Match quarter points and sew slowly around the curve.
Repeat for the lining.
Take your time here — curves reward patience.
Step 3: Assemble the Brim
Sew the brim segments together along the short edges to form a full ring.
Repeat for:
- Outer brim
- Lining brim
- Interfacing brim (if using)
Layer outer brim, interfacing, and lining brim together and baste around the edges.
Step 4: Attach the Brim to the Hat
Pin the brim to the bottom edge of the outer hat body, right sides together.
Sew all the way around.
Repeat with the lining, leaving a small gap for turning.
Step 5: Turn and Finish
Turn the hat right side out through the lining gap.
Hand stitch the opening closed.
Press well.
Optional but highly recommended:
Topstitch the brim in parallel rows about 1 cm apart for that classic bucket hat look and extra stability.
Adjusting This Pattern for Larger Adult Heads
To size up for 60–62 cm:
- Add length to the side band only
- Keep the height the same
- Adjust the brim seam slightly if needed
This preserves the shape while improving fit.