Disclosure: Post and giveaway sponsored by Pennington Vertical Gardens, but all opinions are my own. Please see below for additional disclosure.
If you haven’t entered my giveaway for a $50 American Express gift card, go to my giveaway post and get yourself entered now. Today is the last day for entries!
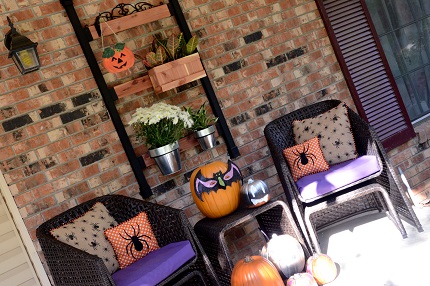
Last week I showed you the blank wall on my front porch. I’m happy to say that it’s not a blank wall any more.
My Pennington Vertical Garden is the perfect backdrop for my seating area!!
I think it’s a rule somewhere that fall plants MUST include mums.
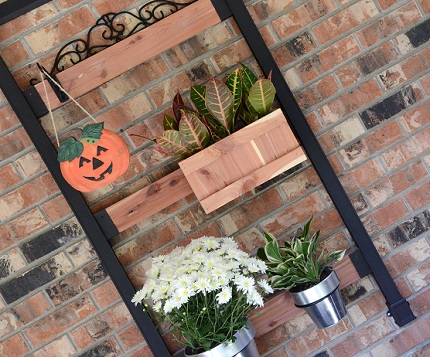
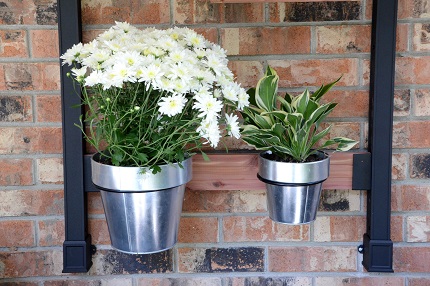
So I bought a 1-gallon mum and planted it in the largest silver pot. In the smaller silver pot, I put a shade loving hosta. (Bonus: When it gets too big for this pot, I can divide it and one of the halves in my yard.)
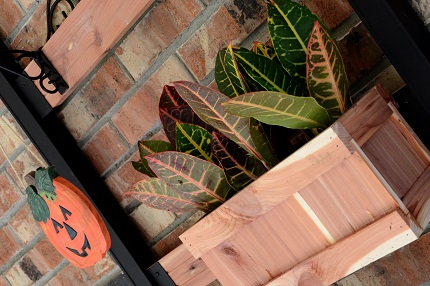
In the wooden box, I planted three small crotons. They’re houseplants, but we live in a warmer climate so they should be good through all but the coldest winter weeks.
And I couldn’t resist hanging something from a hook. Ideally, I would have put a blooming hanging plant, but the options for that are pretty slim in the fall. I decided a happy pumpkin sign would make a cute accent for Halloween décor.
I am impressed with the quality of the Pennington Vertical Garden! It’s made of heavy duty metal, with cedar planks to hang the plants from. The wooden planting box is also made of cedar. The plant hooks and hanging hooks are substantial metal.
I’m pleased with how easy it is to arrange the plants on the rails. I could rework and rearrange my plants until I got the look I wanted. And when the season changes or I want to restyle my décor, I can easily create a new arrangement. All of the parts are sold separately so I can add new planters as I go along.
I installed my garden on a covered porch. I can water my plants with a watering can. But the other day we had a good soaking rain. Because the plants are easy to remove, I could just take the pots down and set them out on my steps where they’d get the benefit of the rain.
The space on my porch is limited, so the fact that the Pennington Vertical Garden doesn’t take up much space is a huge plus. Including the big silver pot, it’s just 11 inches deep.
Installation was easy! You can get detailed installation instructions at the Pennington website, but here’s a quick rundown.
First, choose a good location with a sturdy wall. They recommend a wall of drywall, wood, brick, stone, or stucco. If you’re installing to drywall, you’ll need to locate the studs. Then, you’ll mount the top support rail, then the vertical rails, decorative top, and bottom caps. Now it’s time to place the wood planks that go across. The wood planks fit into mounting brackets that are easily placed into slots in the vertical rails. There are slots all up and down the vertical rails so you can place the wood planks exactly where you want them. The last step is to install the decorative top cap and the top rail decorative cover.
My husband was able to do all of this in just 30 minutes. (Granted, he’s handy with tools and assembly.)
After you’ve got the rails and the planks installed, you can go to town with your arranging your plants. There are plenty of options for planters and pots and hooks to hang on the rails. They’re easy to put on and take off so you can rearrange and restyle with the seasons or as your décor changes.
Disclosure Statement: Pennington Vertical Gardens partnered with bloggers such as me to help educate us all about their Pennington Vertical Gardening System products. As part of this program, I received compensation. They did not tell me what to purchase or what to say about the use of the products. Pennington Vertical Gardens believes that consumers and bloggers are free to form their own opinions and share them in their own words. Pennington Vertical Garden’s policies align with WOMMA Ethics Code, FTC guidelines and social media engagement recommendations. A winner will be chosen by random and gift card fulfillment will be handled by a third party.


Leave a Reply