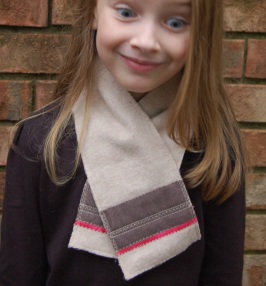
Several years ago, my dear friend Scarlett gave my daughter a little fleece scarflette. Not only did it keep her neck warm, but the smaller size and hook & loop tape closure made it easy for her to put on and take off by herself.
I created this wool version of the scarflette in response to a church project to collect scarves for children in Afghanistan, as winter is coming on and there are many children in need there. I have a large piece of wool melton that I’m using for the outside, and I’m upcycling the twill from old khaki dress pants for the backing. My hope is that the wool will keep the childrens’ necks warm, while the old twill will be soft against their skin.
This is actually a very simple sewing project, so I thought I’d share a tutorial. You could make these as Christmas gifts for family and friends, or perhaps donate them to charity that could get them to children in need this winter.
Materials:
- –1 piece wool fabric 4″ x 25″
- –1 piece cotton backing fabric 4″ x 25″
- –fabric scraps for embellishment
- –sew-on hook & loop tape
- –glue stick
- –temporary spray adhesive for fabric
Here’s what to do:
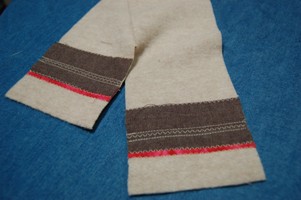
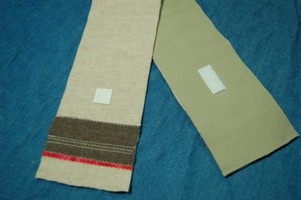
1. Embellish the ends of the wool piece with your fabric scraps. The one I made for this tutorial is intended for a boy so I just stitched down some simple stripes. If you are making one for a girl, you can go crazy withyoyos or fabric flowers.I kept the edges raw, but zig zagged them down to keep from fraying.
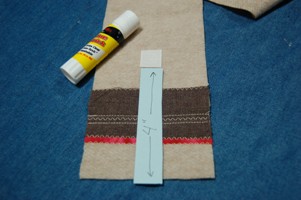
2. Cut a square of the bumpy side of the hook & loop tape and center it across the wool, 4″ from the bottom. Use a bit of glue stick to hold it in place. You’ll stitch it down later, after the glue dries.
(When the scarflette is worn, the ends of the scarf will overlap; the one you’re gluing thehook & loop tapeto will be the bottom one of the two. This isn’t really an issue if both ends have the same embellishment. However, if you put a large flower on one of the ends, you’d want to make sure to put the hook & loop tape on the one thatdoes NOT have the flower.)
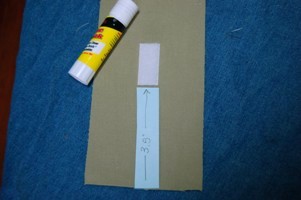
3. Cut a longer rectangle out of the soft side of the hook & loop tape, and center it across the backing fabric, 3.5″ from the bottom. Use a bit of glue stick to hold it in place.
4. After the glue stick dries (it usually doesn’t take long at all), stitch the hook & loop tape down to the scarf pieces. I don’t have a photo of this step because I got so excited taking pictures that I forgot. I ended up hand stitching them down after the scarflette was completed. It’s MUCH easier to just stitch them down by machine!
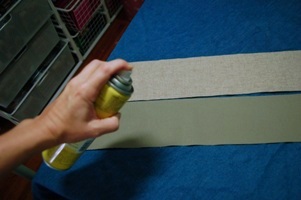
5. Now for the spray adhesive. Lay out both pieces so the backs are facing up, and spray lightly with the fabric adhesive.
6. Carefully layer the wool piece on top of the backing, keeping the edges even and smoothing out wrinkles as you go. Be sure that the hook & loop pieces are at opposite ends of the scarflette.
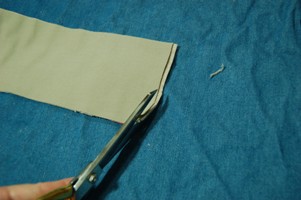
7. When I layered my pieces, one piece was slightly longer than the other. If that happens, just trim off the longer piece. It’ll be our little secret.
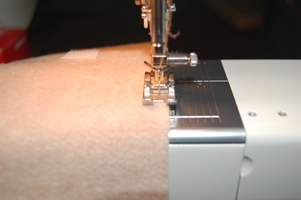
8. Now it’s time to stitch the pieces together. I used a 3/16″ seam allowance, which is close to the edge but gives room for me to go back and zig zag the edges. There isn’t a marking for 3/16″ on my machine, but it fell more or less on the edge of my feed dogs; I just lined my fabric up with that.
The spray adhesive serves as your basting,which meansthere’s no need for pins. Even though the layers are lightly glued together, there may be some slippage as you sew the long seams. My advice here is to stitch the same direction down the long sides of the scarflette. That way, if there is slippage, it will be all in one direction and you can trim the ends. (If there is slippage and you’re sewing around the rectangle, you run the chance of warping the shape.)

9. Stitch around the scarf one more time, this time with zig zag stitches. Position the zig zag so that one side of the stitch is just barely off the edge of the scarf. This will help prevent fraying on the raw edges.
That’s it! A child’s wool scarflette.


This idea totally rocks! Your design is adorable, and I love the idea of upcycling for a good cause.
Denise
Awesome idea/tutorial! And adorable model 🙂
Olivia is so cute in her scarflette. Thanks for the mention and the great tutorial; it makes me want to dig out some wool and start playing.
Scarlett