
Make a special Valentine’s dinner even more special with these heart-themed napkin rings. They’re easy to make and because all the pieces button together, you can mix and match to get the look you want. Stamp a fun message on the twill tape, or stamp someone’s name to make custom napkin ring placecards.
Here’s what you need to make a set of 4:
—6″x9″ each of two fabrics.
–6×9″ piece of fusible webbing.
–4 buttons. They don’t have to match, but they should be all the same size. If you want the band portion of the napkin ring to be reversible, you’ll need 8 buttons.
–at least 18″ of 3/4″ twill tape.
–small alphabet stamps & any other stamps you might want to use to embellish the heart.
–fabric-friendly stamping ink . I used Staz-On black. You could also use acrylic craft paint in a pinch.
–temporary marking pen or chalk to mark buttonhole placement.
Here’s how to make them:
1. Follow the manufacturer’s instructions on the fusible webbing to fuse the two pieces of fabric together. You’ll end up with a double-sided piece of fabric that low-fray edges.
2. Cut 4 1″x6″ strips from your fused fabric. These will form the bands that wrap around the napkins.
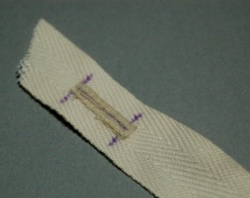
3. Stitch a buttonhole at one end of each band. I like to use a water-soluble marker to make stitching guides so the buttonholes are placed just the way I want them.
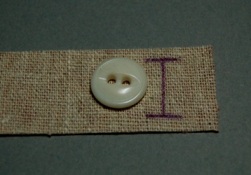
This is a stitch guide I marked.
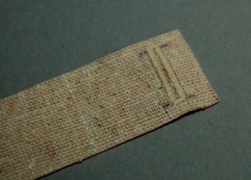
Here it is all stitched up.
4. Cut out 4 heart shapes from the remaining piece of fused fabric. If you want to stamp an image on your heart, now is a good time to do it. You can go back and do it later like I did, but it’s easier to do it before you stitch the buttonhole.
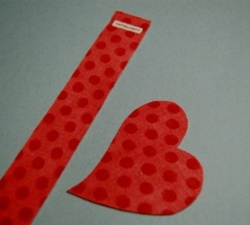
I realized that I haven’t yet shown the underside of my fused fabric. Here’s what the pieces look like on the patterned side.
5. Now, stitch a buttonhole somewhere on each heart. You can place it smack-dab front and center, or place it off-kilter for a more funky look. I went for a little funk.
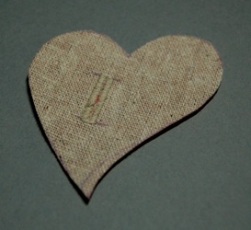
See all those lines left over from marking my cut lines and buttonholes? They’ll disappear with a little water.
6. Cut the twill tape into 4 pieces, each long enough to accommodate a buttonhole and a stamped word. I stamped my word on a piece of paper and measured, then added 2 inches for the buttonhole and top/bottom margins. It’s best to err on the side of it being too long; you can always cut the tape shorter after you’ve stamped it.
7. Mark and stitch a buttonhole at the end of each piece of twill tape.
8. Stamp a sentiment or a person’s name down the tape and trim the ends.

9. Wrap each fabric band around a rolled up napkin and mark the placement for your buttons. Stitch the button down. If you want the band to be completely reversible, stitch a button on each side of the fused fabric back to back. (I didn’t do this for mine because it didn’t occur to me until I was writing these instructions.)
10. Now for the fun part! Assemble your napkin rings in any of these ways:
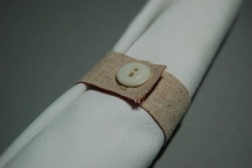
Just the band.
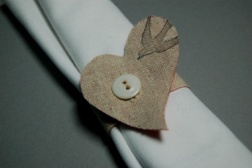
The band with the heart. (See the stamped bird I added?)
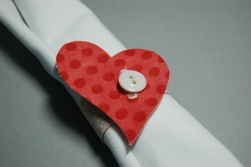
Or reverse the heart to show the print on the other side.
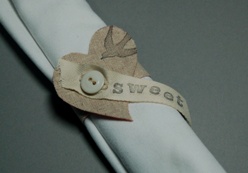
Button on the twill tape to add a sweet message. In this case, the message was literally “sweet.”
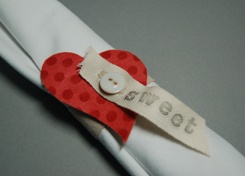
Here’s the contrasting side of the heart with the message buttoned on.
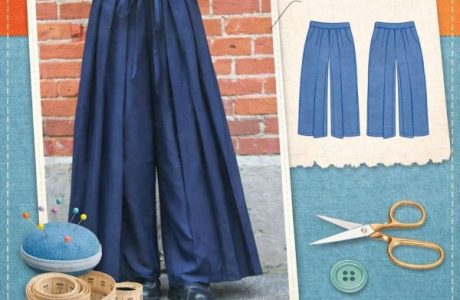
Check out these sewing books for sewing valentines day projects and these sewing patterns on Etsy.


Holy mackeroly! The possibilities are endless! You’re a genius!
These are so sweet. Great instructions too!