• Home
  • Suggest A DIY
  • DIY Newsletter

Sewing

Patterns, Techniques, Articles, Blogs, and other resources to learn how to sew

  • About CraftGossip
  • Our Network
    • Bath & Body Crafts
    • Candle Making Ideas
    • Crochet Ideas
    • Cross Stitch
    • Edible Crafts
    • Felting Patterns
    • Glass Art
    • Home & Garden Ideas
    • Indie Crafts
    • Jewelry Making
    • Kids Crafts
    • Knitting Patterns
    • Lesson Plans
    • Needlework
    • Party Ideas
    • Polymer Clay
    • Quilting Ideas
    • Recycled Crafts
    • Scrapbooking
    • Sewing Patterns
    • Card Making
    • DIY Weddings
    • Not Craft Ideas
  • Giveaways
  • Roundups
  • Store
  • Search

Tutorial: Potato bag for microwaving baked potatoes

January 23, 2010 by Anne Weaver

I’ve recently found out that the secret to perfect baked potatoes in the microwave is to put them in a bag while you cook them.

Jennifer Ackerman-Haywood of Craft Sanity has created a tutorial for making a fabric bag for microwaving potatoes, and it’s a game changer! No more struggling with a flimsy paper sack, this fabric bag is made of cotton and is designed to handle the heat of the microwave.

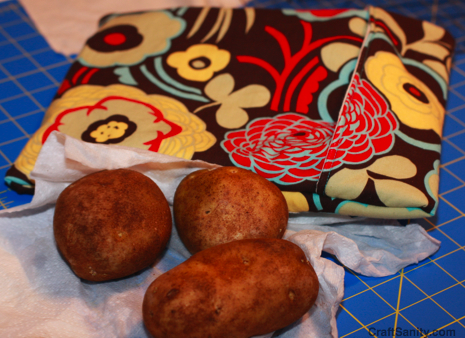
To make your own, you will need cotton thread, two 11 x 24-inch pieces of cotton fabric, and one piece of cotton quilt batting cut to the same size.

The tutorial is easy to follow, with clear instructions and helpful illustrations. Whether you’re a seasoned seamstress or just looking to try something new, this fabric bag is the perfect project for you. 

Here are some popular recipes you can make with microwave-boiled potatoes:

Classic Butter and Herb Potatoes: Cook potatoes in the microwave until soft, then toss with melted butter, minced garlic, chopped fresh herbs, salt, and pepper.

Cheesy Scalloped Potatoes: Slice the boiled potatoes and layer them in a baking dish with shredded cheese and a cream sauce made with milk and flour. Bake until the cheese is melted and bubbly.

Potato Salad: cook the potatoes in the microwave, then toss with diced red onions, diced celery, mayonnaise, and a splash of vinegar.

Garlic Roasted Potatoes: Cook the potatoes in the microwave, then toss with olive oil, minced garlic, salt, and pepper. Roast in a hot oven until crisp and golden.

Baked Potato Skins: Cut the cooked potatoes in half, scoop out the flesh, and brush the skins with melted butter and a sprinkle of salt. Bake until crispy and serve with sour cream, cheese, and green onions.

You can also buy Microwave potatoes bags if you want to test them out before handmaking one. 


Next Pattern:

  • Simple Sew Microwave Potato Bag - Easy Sewing Tutorial
  • Soccer Boots Bag: A Handy Drawstring Bag Sewing Tutorial
  • Plastic Bag Holder from a Shirt Sleeve - DIY Sewing Tutorial
«
»

Comments

  1. linda says

    July 28, 2011 at 12:08 pm

    i would like to get a free pattern for a potato bag

  2. Sandi says

    November 2, 2011 at 9:23 pm

    I saw one at a craaft show and want to make me one

  3. dottie willie says

    March 20, 2012 at 2:22 am

    I have been trying to make a potatoe bag I got the pattern I hve made 3 of them and they all caught on fore I used every 100% cotton what is wrong?

    • anneweaver says

      March 21, 2012 at 8:35 am

      Unfortunately, I don’t have an answer to this question. The only thing I can think of is that perhaps you heated it too long or on higher power. –Anne

  4. Doris Terrell says

    May 10, 2012 at 12:02 pm

    want to make a potato bag but don’t have a pattern. I’ve seen the bags and I’ve heard they work great.

  5. Doris Terrell says

    May 10, 2012 at 12:05 pm

    want to make a potato bag but don’t have a pattern. I’ve seen the bags and I’ve heard they work great.

  6. Lucille says

    March 25, 2013 at 8:01 pm

    Would like a pattern to sew my own potato bag….have used one & really like it.

  7. Harleyguy says

    March 29, 2013 at 4:41 pm

    Make sure you wrap your potatoes in wet paper towels before placing inside the bag. The moisture is used to cook the food and cool the bag down. I hope this helps

  8. Phyllis Ream says

    October 1, 2013 at 12:03 pm

    I would very much like a pattern for a baked potato bag.

    I;m 84 years old and there isn;t much I can see to make but still like to try

    Please and Thanks

  9. Brenda says

    October 14, 2013 at 7:13 pm

    Just wanted to make sure that Dottie didn’t use fusible batting. That could be an issue

  10. Mary says

    November 23, 2013 at 8:36 am

    Summary of comments above:
    First, wrapping in paper towels is not necessary, however it does help keeping the bags clean longer.
    2. dottie willie,

    (a) make sure you are also using 100% cotton batting? Sometimes, even products labeled 100% cotton will have a synthetic scrim in them.

    (b) duh, is the thread you used also 100% cotton? (did you remember to change the bobbin as well?)

    (c) Lastly, and this is a big-ole ‘duh’ moment, are you pu0ting potatoes in the bags when testing them? Just heating an empty bag, is a great way to catch ’em on fire.

  11. Carol Doyle says

    December 4, 2013 at 7:54 pm

    I’ve always used 100% cotton fabric/thread and Warm Tater batting for my potato bags. My neighbor just ordered a potato bag from a TV commercial. Shell is 100% polyester, lining is 85% polyester/15% cotton, batting is 100% polyester! What?????

  12. janice greening says

    January 8, 2014 at 3:44 pm

    I am wondering if instead of a paper towel could you use a piece of muslin to wrap the potato in before baking. I thought then it could be washed and re-used rather than throwing away the toweling.

  13. Sheree says

    January 24, 2014 at 3:10 pm

    I just bought the items to make a microwave baked potato bag, and there is actual batting made just for that purpose. It is called Warm tater 100% Cotton for potato bags and other microwave projects. Doesn’t have resin or glue in it. Website:
    http://www.warmcompany.com

Have you read?

Pricing Handmade Sewing Items Without Undervaluing Yourself

If there’s one topic that makes sewists uncomfortable faster than sewing zippers, it’s pricing. Not how to sew the item — but how much to charge for it once it’s finished.

Most people don’t struggle with making handmade items. They struggle with putting a price on their time, skill, and effort without feeling awkward, guilty, or worried they’ll scare buyers away.

If you’ve ever thought:
“I’m not good enough to charge that much,”
“People won’t pay handmade prices,”
or “I’ll just price it low until I get better,”

you’re not alone. But you’re also not doing yourself any favours.

Let’s talk about how to price handmade sewing items in a way that’s fair, realistic, and sustainable — without undervaluing yourself.

Why Undervaluing Your Sewing Hurts More Than You Think

Underpricing doesn’t just affect your income. It affects your motivation, your confidence, and how seriously buyers take your work.

When handmade items are priced too low:

  • You burn out faster

  • You resent the time spent making them

  • You struggle to restock

  • Buyers assume “cheap” equals “low quality”

Ironically, pricing too low can make selling harder, not easier.

Handmade sewing items aren’t competing with mass-produced factory goods. They’re competing with thoughtfulness, quality, and care — and those have value.

Start With the Real Cost (Not Just Fabric)

One of the biggest pricing mistakes beginners make is charging only for materials.

Fabric, thread, zips, interfacing, labels, packaging — these are your base costs. But they’re only the starting point.

You also need to account for:

  • Cutting time

  • Sewing time

  • Pressing and finishing

  • Packaging

  • Listing, photographing, or selling time

Even if you enjoy sewing, your time still counts.

A simple rule:
If someone else had to make this for you, what would you expect to pay them per hour?

The “Straight Line” Trap (And Why It’s Not a Problem)

Many sewists worry that because their items are “simple,” they don’t deserve higher prices.

Straight seams, basic construction, minimal shaping — these are often seen as beginner skills. But from a buyer’s perspective, simplicity is often a feature, not a flaw.

Simple items are:

  • Practical

  • Durable

  • Easy to use

  • Less intimidating

  • Often more giftable

A well-made tote bag, table runner, or pouch doesn’t lose value because it’s simple. It gains value because it works.

A Simple Pricing Formula That Actually Works

You don’t need complicated spreadsheets to price handmade sewing items.

A beginner-friendly formula looks like this:

Materials + (Hourly rate × Time) + Fees = Price

Your hourly rate doesn’t need to be high — but it does need to exist.

Even a modest rate acknowledges that your time matters.

And remember: pricing isn’t permanent. You’re allowed to adjust as you learn.

Why “Charging Less Until I’m Better” Backfires

This mindset feels sensible, but it causes long-term problems.

When you price low “for now,” you:

  • Attract bargain-focused buyers

  • Set expectations that are hard to raise later

  • Undermine your confidence

  • Train yourself to accept less

Your skill will improve through repetition, not through underpricing.

Selling handmade items is a skill too — and pricing fairly is part of learning it.

What Buyers Are Actually Paying For

Most buyers don’t analyse your stitching technique.

They’re paying for:

  • Convenience

  • Thoughtful design

  • Quality materials

  • Handmade care

  • Supporting a real person

They want something useful, well made, and ready to use — not a bargain-bin price.

When you price confidently, buyers feel more confident too.

Comparing Prices Without Panicking

It’s smart to look at what others charge — but don’t use comparison as a weapon against yourself.

Instead of asking:
“Why are they charging more than me?”

Ask:

  • Are they targeting the same customer?

  • Are they selling the same type of item?

  • Are their materials similar?

There is room for different price points. You don’t need to be the cheapest to be successful.

Pricing for Sustainability, Not Just Sales

Selling handmade items should feel rewarding, not exhausting.

If your prices don’t allow you to:

  • Replace materials

  • Restock without stress

  • Enjoy sewing

  • Take breaks

…they’re too low.

A sustainable price keeps you sewing longer — and consistency is what builds sales over time.

The Confidence Shift That Changes Everything

Instead of asking:
“Is this worth what I’m charging?”

Ask:
“Would I be proud to sell this?”

If the item is:

  • Well made

  • Useful

  • Finished with care

Then it deserves a fair price.

You don’t need permission to charge what your work is worth. You just need to believe that your time, effort, and creativity matter.

Because they do.

Book Review – Sewing to Sell – The Beginner’s Guide to Starting a Craft Business

Selling your handmade items? Here’s how to figure a fair price.

Categories

Bags and purses Children's Christmas Easter fleece Free Sewing Patterns Girl's Dress Halloween Hats Home Decor No-sew Pillows Refashions Scrap Fabric sewing Sewing Patterns Sewing Techniques Skirts Softies T-shirts

RSS More Articles

  • The 5 Outlet Placement Mistakes You Don’t Want to Make
  • Celebrate the Spirit of the Southwest with These Stunning Indian Navajo Tribal Quilt Patterns
  • Pricing Handmade Sewing Items Without Undervaluing Yourself
  • Tips for Teaching the Alphabet to Kids
  • Yarn Sardines T-Shirt Review – A Whimsical Gift For Yarn Lovers
  • Cropped Chunky Granny Stitch Cardigan Crochet Pattern
  • Free Butterfly Digital Stamps for Card Making, Coloring and Paper Crafts
  • 14 Masculine Card Ideas for Guys
  • Juneteenth Cross Stitch Patterns
  • Ties to Knit for Father’s Day

Pick Your Blog

  • Sewing
  • Knitting
  • Quilting
  • Crochet
  • Home & Garden
  • Recycled Crafts
  • Scrapbooking
  • Card Making
  • Polymer Clay
  • Cross-Stitch
  • Edible Crafts
  • Felting
  • Glass Art
  • Indie Crafts
  • Kids Crafts
  • Jewelry Making
  • Lesson Plans
  • Needlework
  • Bath & Body
  • Party Ideas
  • Candle Making
  • DIY Weddings
  • Not Craft
  • Free Craft Projects

Copyright © 2026 · CraftGossip | Start Here | Contact Us | Link to Us | Your Editors | Privacy and affiliate policy