So after last week’s test run of the bike shorts, I had planned to make piles and piles of bike shorts for my daughter. And I did get one made, and photo’d it along the way so I could write a tutorial. (Here’s the tute. Edited to add: The link says it’s for leggings, but I use the same pattern for leggings and for bike shorts. Just cut them shorter to make them bike shorts.)
And then I got distracted and my mind moved on to other projects.
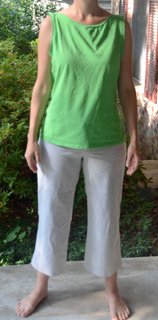 Like these thrifted capri pants and rummage sale green knit top. The green top is two sizes too big, and while the pants are actually a perfect fit the shape is REALLY not flattering! But I loved the fabric (white with black pin stripes!) and the fact it has a curved waistband that doesn’t show my panties.
The knit top was quick and easy. I just took in the sides to make it snug to my body.
I cut off the capris to make a pair of shorts. The first go-round was a sewing fail, as I had not paid attention to how tight the capris fit through the butt. It isn’t all that evident when the legs of the pants are long and loose, but cut off those legs and all you see are the tight shorts. REALLY tight shorts. REALLY REALLY tight shorts.
I put them aside for a day and came up with a solution. First, I picked the seams with a seam ripper. The seam allowances are serged so then I restitched just to the inside of the serging. I did this for the side seams and the inseams and I gained probably 1/2″ to 3/4″ ease on each leg. I also shortened the already fairly short shorts a little more. Now they fit perfectly and look pretty nice, if I say so myself.
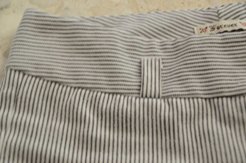
 Here are the refashioned versions of the same top and pants. Neither photo shows the aweseomeness of the fabric on the shorts, so here’s a close-up.
I also made a mock-up of a slightly dressy version of a t-shirt. It was inspired by a shirt I saw when shopping at The Limited this weekend. (I couldn’t find a picture in their online catalog. Hmmm… Maybe I dreamed it?) It’s basically a t-shirt made with a satin-y nonstretch fabric on the front, and a regular stretch knit on the back and sleeves.
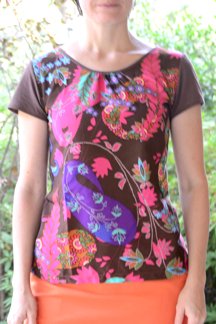 This was my first version. I used fabric I really didn’t care for in case it didn’t work. And that’s good because there are a few adjustments needed for I make it “for reals”. I adapted the pattern from a t-shirt pattern intended for stretch knits. I didn’t allow enough ease for the non-stretchy fabric so it fits a little snug through the bust. I’m also going to scoop the neck a tad bit lower on the next one, and maybe do a thicker binding around the neck line.
So that’s it for my sewing recap. I don’t know how much sewing will happen in the week to come. I’m getting a new fridge delivered tomorrow, so there’s much cleaning out to be done. This will probably lead to all sorts of reorganizing madness in my kitchen, which will be nice but will most likely keep me out of the studio. We’ll see – maybe I can sneak in a project or two. 🙂



the bike shorts link goes to the leggings crotch tute … can i get the bike shorts link? i’m excited!
Krissy, The bike shorts are just a shorter version of the leggings. I use my leggings pattern for my bike shorts. I just fold it up at the bottom about 4-5″ from the crotch. –Anne
Great redos. I do that a lot with kids clothes. I’ll have to attempt some grown-up stuff